Relative Volume at Time█ OVERVIEW
This indicator calculates relative volume, which is the ratio of present volume over an average of past volume.
It offers two calculation modes, both using a time reference as an anchor.
█ CONCEPTS
Calculation modes
The simplest way to calculate relative volume is by using the ratio of a bar's volume over a simple moving average of the last n volume values.
This indicator uses one of two, more subtle ways to calculate both values of the relative volume ratio: current volume:past volume .
The two calculations modes are:
1 — Cumulate from Beginning of TF to Current Bar where:
current volume = the cumulative volume since the beginning of the timeframe unit, and
past volume = the mean of volume during that same relative period of time in the past n timeframe units.
2 — Point-to-Point Bars at Same Offset from Beginning of TF where:
current volume = the volume on a single chart bar, and
past volume = the mean of volume values from that same relative bar in time from the past n timeframe units.
Timeframe units
Timeframe units can be defined in three different ways:
1 — Using Auto-steps, where the timeframe unit automatically adjusts to the timeframe used on the chart:
— A 1 min timeframe unit will be used on 1sec charts,
— 1H will be used for charts at 1min and less,
— 1D will be used for other intraday chart timeframes,
— 1W will be used for 1D charts,
— 1M will be used for charts at less than 1M,
— 1Y will be used for charts at greater or equal than 1M.
2 — As a fixed timeframe that you define.
3 — By time of day (for intraday chart timeframes only), which you also define. If you use non-intraday chart timeframes in this mode, the indicator will switch to Auto-steps.
Relative Relativity
A relative volume value of 1.0 indicates that current volume is equal to the mean of past volume , but how can we determine what constitutes a high relative volume value?
The traditional way is to settle for an arbitrary threshold, with 2.0 often used to indicate that relative volume is worthy of attention.
We wanted to provide traders with a contextual method of calculating threshold values, so in addition to the conventional fixed threshold value,
this indicator includes two methods of calculating a threshold channel on past relative volume values:
1 — Using the standard deviation of relative volume over a fixed lookback.
2 — Using the highs/lows of relative volume over a variable lookback.
Channels calculated on relative volume provide meta-relativity, if you will, as they are relative values of relative volume.
█ FEATURES
Controls in the "Display" section of inputs determine what is visible in the indicator's pane. The next "Settings" section is where you configure the parameters used in the calculations. The "Column Coloring Conditions" section controls the color of the columns, which you will see in three of the five display modes available. Whether columns are plotted or not, the coloring conditions also determine when markers appear, if you have chosen to show the markers in the "Display" section. The presence of markers is what triggers the alerts configured on this indicator. Finally, the "Colors" section of inputs allows you to control the color of the indicator's visual components.
Display
Five display modes are available:
• Current Volume Columns : shows columns of current volume , with past volume displayed as an outlined column.
• Relative Volume Columns : shows relative volume as a column.
• Relative Volume Columns With Average : shows relative volume as a column, with the average of relative volume.
• Directional Relative Volume Average : shows a line calculated using the average of +/- values of relative volume.
The positive value of relative volume is used on up bars; its negative value on down bars.
• Relative Volume Average : shows the average of relative volume.
A Hull moving average is used to calculate the average used in the three last display modes.
You can also control the display of:
• The value or relative volume, when in the first three display modes. Only the last 500 values will be shown.
• Timeframe transitions, shown in the background.
• A reminder of the active timeframe unit, which appears to the right of the indicator's last bar.
• The threshold used, which can be a fixed value or a channel, as determined in the next "Settings" section of inputs.
• Up/Down markers, which appear on transitions of the color of the volume columns (determined by coloring conditions), which in turn control when alerts are triggered.
• Conditions of high volatility.
Settings
Use this section of inputs to change:
• Calculation mode : this is where you select one of this indicator's two calculation modes for current volume and past volume , as explained in the "Concepts" section.
• Past Volume Lookback in TF units : the quantity of timeframe units used in the calculation of past volume .
• Define Timeframes Units Using : the mode used to determine what one timeframe unit is. Note that when using a fixed timeframe, it must be higher than the chart's timeframe.
Also, note that time of day timeframe units only work on intraday chart timeframes.
• Threshold Mode : Five different modes can be selected:
— Fixed Value : You can define the value using the "Fixed Threshold" field below. The default value is 2.0.
— Standard Deviation Channel From Fixed Lookback : This is a channel calculated using the simple moving average of relative volume
(so not the Hull moving average used elsewhere in the indicator), plus/minus the standard deviation multiplied by a user-defined factor.
The lookback used is the value of the "Channel Lookback" field. Its default is 100.
— High/Low Channel From Beginning of TF : in this mode, the High/Low values reset at the beginning of each timeframe unit.
— High/Low Channel From Beginning of Past Volume Lookback : in this mode, the High/Low values start from the farthest point back where we are calculating past volume ,
which is determined by the combination of timeframe units and the "Past Volume Lookback in TF units" value.
— High/Low Channel From Fixed Lookback : In this mode the lookback is fixed. You can define the value using the "Channel Lookback" field. The default value is 100.
• Period of RelVol Moving Average : the period of the Hull moving average used in the "Directional Relative Volume Average" and the "Relative Volume Average".
• High Volatility is defined using fast and slow ATR periods, so this represents the volatility of price.
Volatility is considered to be high when the fast ATR value is greater than its slow value. Volatility can be used as a filter in the column coloring conditions.
Column Coloring Conditions
• Eight different conditions can be turned on or off to determine the color of the volume columns. All "ON" conditions must be met to determine a high/low state of relative volume,
or, in the case of directional relative volume, a bull/bear state.
• A volatility state can also be used to filter the conditions.
• When the coloring conditions and the filter do not allow for a high/low state to be determined, the neutral color is used.
• Transitions of the color of the volume columns determined by coloring conditions are used to plot the up/down markers, which in turn control when alerts are triggered.
Colors
• You can define your own colors for all of the oscillator's plots.
• The default colors will perform well on light or dark chart backgrounds.
Alerts
• An alert can be defined for the script. The alert will trigger whenever an up/down marker appears in the indicator's display.
The particular combination of coloring conditions and the display settings for up/down markers when you create the alert will determine which conditions trigger the alert.
After alerts are created, subsequent changes to the conditions controlling the display of markers will not affect existing alerts.
• By configuring the script's inputs in different ways before you create your alerts, you can create multiple, functionally distinct alerts from this script.
When creating multiple alerts, it is useful to include in the alert's message a reminder of the particular conditions you used for each alert.
• As is usually the case, alerts triggering "Once Per Bar Close" will prevent repainting.
Error messages
Error messages will appear at the end of the chart upon the following conditions:
• When the combination of the timeframe units used and the "Past Volume Lookback in TF units" value create a lookback that is greater than 5000 bars.
The lookback will then be recalculated to a value such that a runtime error does not occur.
• If the chart's timeframe is higher than the timeframe units. This error cannot occur when using Auto-steps to calculate timeframe units.
• If relative volume cannot be calculated, for example, when no volume data is available for the chart's symbol.
• When the threshold of relative volume is configured to be visible but the indicator's scale does not allow it to be visible (in "Current Volume Columns" display mode).
█ NOTES
For traders
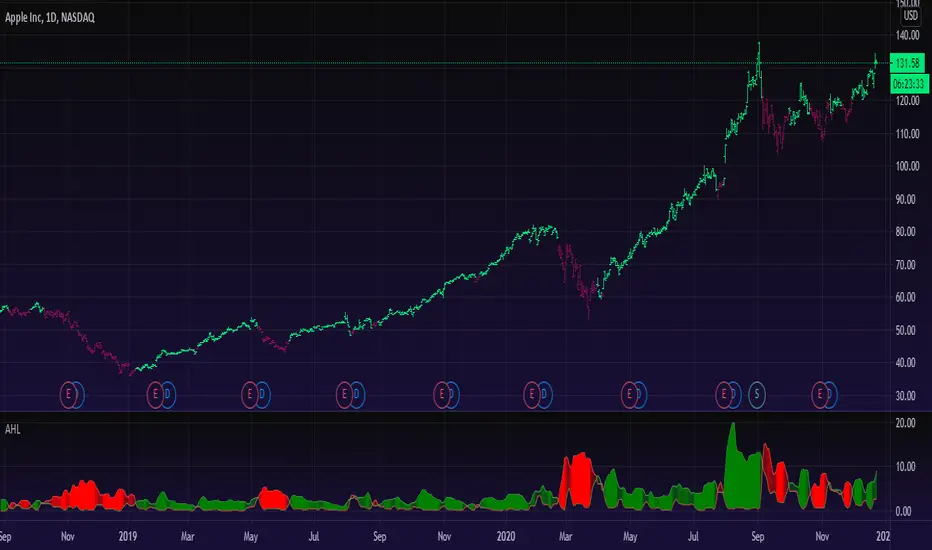
The chart shown here uses the following display modes: "Current Volume Columns", "Relative Volume Columns With Average", "Directional Relative Volume Average" and "Relative Volume Average". The last one also shows the threshold channel in standard deviation mode, and the TF Unit reminder to the right, in red.
Volume, like price, is a value with a market-dependent scale. The only valid reference for volume being its past values, any improvement in the way past volume is calculated thus represents a potential opportunity to traders. Relative volume calculated as it is here can help traders extract useful information from markets in many circumstances, markets with cyclical volume such as Forex being one, obvious case. The relative nature of the values calculated by this indicator also make it a natural fit for cross-market and cross-sector analysis, or to identify behavioral changes in the different futures contracts of the same market. Relative volume can also be put to more exotic uses, such as in evaluating changes in the popularity of exchanges.
Relative volume alone has no directional bias. While higher relative volume values always indicate higher trading activity, that activity does not necessarily translate into significant price movement. In a tightly fought battle between buyers and sellers, you could theoretically have very large volume for many bars, with no change whatsoever in bid/ask prices. This of course, is unlikely to happen in reality, and so traders are justified in considering high relative volume values as indicating periods where more attention is required, because imbalances in the strength of buying/selling power during high-volume trading periods can amplify price variations, providing traders with the generally useful gift of volatility.
Be sure to give the "Directional Relative Volume Average" a try. Contrary to the always-positive ratio widely used in this indicator, the "Directional Relative Volume Average" produces a value able to determine a bullish/bearish bias for relative volume.
Note that realtime bars must be complete for the relative volume value to be confirmed. Values calculated on historical or elapsed realtime bars will not recalculate unless historical volume data changes.
Finally, as with all indicators using volume information, keep in mind that some exchanges/brokers supply different feeds for intraday and daily data, and the volume data on both feeds can sometimes vary quite a bit.
For coders
Our script was written using the PineCoders Coding Conventions for Pine .
The description was formatted using the techniques explained in the How We Write and Format Script Descriptions PineCoders publication.
Bits and pieces of code were lifted from the MTF Selection Framework and the MTF Oscillator Framework , also by PineCoders.
█ THANKS
Thanks to dgtrd for suggesting to add the channel using standard deviation.
Thanks to adolgov for helpful suggestions on calculations and visuals.
Look first. Then leap.
"high low"に関するスクリプトを検索
Rabbit HoleHow deep is the Rabbit hole? Interesting experiment that finds the RISING HIGHS and FALLING LOWS and place the difference between the highs and lows into separate arrays.
== Calculations ==
In case current high is higher than previous high, we calculate the value by subtracting the current highest high with the previous High (lowest high) into array A,
same method for the lows just in Array B.
Since we subtract highs and lows it means velocity is taken into consideration with the plotting.
After adding a new value we remove the oldest value if the array is bigger than the Look back length. This is done for both lows and highs array.
Afterwards we sum up the lows and highs array (separately) and plot them separately, We can also smooth them a bit with Moving averages like HMA, JMA, KAMA and more.
== RULES ==
When High Lines crosses the Low Line we get a GREEN tunnel.
When Low Lines crosses the High line we get the RED tunnel.
The Greenish the stronger the up trend.
The Redish the stronger the downtrend.
== NOTES ==
Bars are not colored by default.
Better for higher time frames, 1 hour and above.
Enjoy and like if you like!
Follow up for new scripts: www.tradingview.com
Pine Script® インジケーター
Extrapolated Pivot Connector - Lets Make Support And ResistancesIntroduction
The support and resistance methodology remain the most used one in technical analysis, this is mainly due to its simplicity, and unlike lots of techniques used in technical analysis support and resistances have a certain logic, price can sometimes appear moving into a channel, support and resistances allow the trader to estimate such channel and project it into the future in order to spot points where price might reverse direction.
In this script a simple linear support and resistance indicator is proposed, the indicator is made by connecting past pivot high's/low's to more recent ones and extrapolating the resulting connection. The indicator is also able to make support and resistances by using other indicators as input.
Indicator Settings
The indicator include various settings, the first one being the length setting who determine the sensitivity of the pivot high/low detection, low values of length will detect the pivot high/low of noisy variations, while higher values will detect the pivot high/low of longer term variations.
The figure above use length = 5.
The A-High parameter determine the position of the pivot high to be used as first point of the resistance line, higher values will use oldest pivot high's as first point. The B-High parameter determine the last pivot high. A-Low and B-Low work the same way but affect the support line, a label is drawn on the chart in order to help you determine the position of A/B-High/Low.
Using Other Indicators Output As Input
The "Use Custom Source" option allow you to apply the indicator to other indicators, for example we can use a moving average of period 50 as input
Or the rsi :
Let me help you set the proposed indicator easily to indicators appearing on a separate window, for example the momentum oscillator, add the momentum oscillator to the chart, to do so click on indicator and search "momentum", click on the first result, once on the chart put your mouse pointer on the indicator title, you'll see appearing the hide, settings and delete option, at the right of delete you should see three dots which represent the "more" option, click on it and select "Add indicator on Mom" and select the extrapolated pivot indicator, you can do that by searching it, altho it might be easier to do it by adding the indicator to favorites first, you then only need to select it from your favorites.
You might see a mess on the indicator window, thats because the extrapolated pivot is still using high and low as input, go to the settings of the extrapolated pivot indicator and check "Use Custom Source", it should appear properly now.
Tips And Tricks When Using Support And Resistances
Linear support and resistances assume an approximately linear trend, if you see non linear growth in the price evolution you can use a logarithmic scale in order to have a more linear evolution. To do so right click on the the chart scale and select "Logarithmic" or use the following key shortcut "alt + l".
When applying the indicator to an oscillator centered around zero make sure to adjust the settings of the oscillator such that the peak magnitude of the oscillator is relatively constant over time.
Here a roc of period 9 has non constant peak amplitude, you can see that by looking at the position of the pivots (circles), increasing the period of the roc help capture more significant pivots high's/low's
Conclusion
In this post an indicator aiming to draw support and resistances is presented, the fact that it can be applied to any other indicator is a relatively nice option, and i hope you might make use of this feature.
The code make heavy use of the new features that where integrated on the v4 of pine, such features are really focused on making figures and labels, things i don't really work with, but it is nice to step out my short codes habits, and i don't exclude working with figures in pine in the future.
Thanks for reading !
Volumetric Supply and Demand Zones [BOSWaves]Volumetric Supply and Demand Zones - Impulse-Based Zone Detection with Embedded Volume Profile Analysis
Overview
Volumetric Supply and Demand Zones is an impulse-driven zone identification system that marks significant reversal areas through swing detection and volume accumulation patterns, where zone boundaries dynamically reflect actual trading activity concentration rather than arbitrary price levels.
Instead of relying on traditional horizontal support/resistance lines or fixed pivot structures, zone placement, thickness, and volumetric composition are determined through ATR-normalized impulse detection, volume profile distribution analysis, and delta decomposition within base formation periods.
This creates adaptive supply and demand boundaries that reflect actual volume accumulation patterns rather than simple price extremes - contracting zones around high-volume concentration areas when profile shows tight distribution, expanding zones during dispersed volume activity, and incorporating positive/negative delta breakdowns to reveal whether zones formed under buying or selling pressure dominance.
Price interactions are therefore evaluated relative to volume-weighted zone structures and point-of-control levels rather than conventional naked price zones.
Conceptual Framework
Volumetric Supply and Demand Zones is founded on the principle that meaningful reversal zones emerge where significant volume accumulated during consolidation before impulse moves rather than at simple swing high/low pivot points.
Traditional supply and demand methods identify zones using price structure alone through swing detection or candlestick patterns, which often ignores the underlying volume distribution and buying/selling pressure that validates institutional accumulation or distribution. This framework replaces price-only logic with volume-weighted zone construction informed by actual trading activity concentration and delta composition.
Three core principles guide the design:
Zone boundaries should encompass base formation periods preceding impulse moves, not isolated pivot candles alone.
Volume profile distribution within zones must reveal where actual trading activity concentrated, identifying true points of control.
Delta decomposition exposes whether zones formed under buying pressure (demand accumulation) or selling pressure (supply distribution).
This shifts supply and demand analysis from naked price levels into volume-validated, delta-aware institutional footprint zones.
Theoretical Foundation
The indicator combines swing pivot detection, ATR-based impulse measurement, volume profile construction, and delta decomposition analysis.
A pivot detection system identifies local swing highs and lows using configurable left/right bar parameters. Impulse validation measures the subsequent price move magnitude relative to ATR, confirming whether the swing preceded a significant directional thrust. Zone boundaries encompass a lookback period of candles forming the base, with maximum height capped by ATR multiplier to prevent excessively large zones. Volume profile divides each zone into horizontal rows, distributing volume proportionally based on price overlap and identifying the point of control (highest volume row). Delta profile separates volume into buying versus selling components using close-open relationships, revealing net directional pressure within each profile row.
Five internal systems operate in tandem:
Swing Detection Engine : Identifies pivot highs and lows using symmetrical left/right bar confirmation for potential zone anchor points.
Impulse Validation System : Measures price movement magnitude following pivot formation, requiring ATR-multiple threshold breach to confirm zone significance.
Volume Profile Constructor : Divides zone height into configurable rows, allocates volume proportionally based on bar price range overlap with each row, identifies POC as highest-volume row.
Delta Decomposition Engine : Separates volume into buying (up-close bars) versus selling (down-close bars) components within each profile row, calculates net delta and dominant pressure direction.
Zone Merge Logic : Detects overlapping zones of same type (supply/supply or demand/demand), combines boundaries and recalculates volume/delta statistics with weighted blending.
This design allows supply and demand zones to reflect actual volume accumulation reality rather than reacting mechanically to price pivots alone.
How It Works
Volumetric Supply and Demand Zones evaluates price through a sequence of volume-aware zone construction processes:
Pivot Identification : Swing detection algorithm identifies local highs and lows using configurable left/right bar symmetry, marking potential reversal zone anchors.
Impulse Magnitude Validation : Following pivot formation, price movement measured relative to ATR over lookback period - move must exceed ATR multiplier threshold to confirm zone validity.
Base Period Boundary Definition : Zone encompasses pivot bar plus configurable lookback candles forming the consolidation base preceding impulse move.
Height Normalization : Raw zone height (high to low of base period) capped at maximum ATR multiplier to prevent zones becoming unreasonably large during extended consolidations.
Volume Profile Row Allocation : Zone divided into configurable number of horizontal rows, each bar's volume distributed proportionally based on price range overlap with row boundaries.
Point of Control Identification : Row with highest accumulated volume marked as POC, representing price level with maximum trading activity concentration within zone.
Delta Component Separation : Each bar's volume classified as buying (close > open) or selling (close < open), allocated to respective delta buckets within overlapping profile rows.
Delta Profile Construction : Net delta (buy volume minus sell volume) calculated per row, rendered as horizontal bars extending from zone right edge inward with green (positive) or red (negative) coloring.
Overlap Detection and Merging : New zones checked against existing zones of same type, overlapping zones within merge gap threshold combined with boundary expansion and volume/delta statistics aggregation.
Mitigation Detection : Price interaction monitoring using configurable method (wick or close) determines when zones violated, triggering zone deletion and cleanup of all visual elements.
Together, these elements form a continuously updating supply and demand framework anchored in volume accumulation reality and delta pressure composition.
Interpretation
Volumetric Supply and Demand Zones should be interpreted as volume-validated institutional footprint zones:
Demand Zones (Green) : Form at swing lows preceding upward impulse moves exceeding ATR threshold - represent areas where buyers accumulated positions before markup phase, volume profile shows where bids concentrated.
Supply Zones (Red) : Establish at swing highs preceding downward impulse moves exceeding ATR threshold - identify areas where sellers distributed positions before markdown phase, volume profile shows where offers concentrated.
Volume Profile Bars : Horizontal bars extending from zone left edge show relative volume distribution across price levels - longer bars indicate higher trading activity, revealing true institutional accumulation/distribution levels versus arbitrary zone edges.
Point of Control Line (White) : Horizontal line within zone marks price level with maximum volume concentration - represents the most significant institutional activity level, often acts as magnetic price level during retests.
Delta Profile Bars : Horizontal bars extending from zone right edge inward display net buying/selling pressure per price level - green bars show buy volume dominance (accumulation), red bars show sell volume dominance (distribution).
Zone Info Box : Text panel on right edge displays zone type (SUPPLY/DEMAND), status (Fresh/Tested), total volume, net delta, and touch count - provides quantitative validation of zone significance.
Fresh Status : Newly created zones not yet tested by price - highest probability reversal zones as institutional orders likely remain unfilled.
Tested Status : Zones where price returned and interacted with boundaries - touch count reveals how many times zone provided support/resistance, excessive touches suggest weakening.
Merged Zones : Wider zones with higher volume/delta values formed by combining multiple overlapping base periods - represent extended institutional accumulation/distribution areas with greater significance.
POC Brightness : Brightest (white) volume profile bar marks point of control - visual emphasis highlights the most critical price level within zone structure.
Volume distribution shape, POC placement, delta composition, and touch count outweigh simple zone boundary reactions.
Signal Logic & Visual Cues
Volumetric Supply and Demand Zones presents zone interaction insights rather than discrete directional signals:
Fresh Zone Formation : New supply or demand zone created when swing pivot followed by ATR-threshold impulse - suggests institutional footprint left behind, high-probability reversal area established.
First Retest (Fresh → Tested) : Price returning to previously untouched zone triggers status change and touch increment - historically highest-probability reaction level as unfilled orders likely remain.
POC Magnetic Behavior : Price gravitating toward white POC line during zone interaction - suggests institutional activity concentration level acting as support/resistance within broader zone.
Volume Profile Asymmetry : Profile showing volume concentrated at zone edge versus center reveals base formation character - edge concentration suggests quick accumulation before impulse, center concentration indicates prolonged consolidation.
Delta Divergence Patterns : Demand zones showing negative delta profile (red bars dominant) or supply zones showing positive delta (green bars) reveal weak zone formation - pressure composition conflicted with expected direction.
Delta Confirmation Patterns : Demand zones with strong positive delta (green bars) or supply zones with strong negative delta (red bars) validate institutional conviction - pressure aligned with expected reversal direction.
Excessive Touch Degradation : Touch count exceeding 3-4 interactions suggests zone weakening - repeated tests consume institutional orders, reducing reversal probability.
Mitigation Events : Price closing beyond zone boundaries (or wicking through, based on settings) triggers zone deletion - invalidation confirms institutional levels failed, trend continuation likely.
The primary value lies in volume-validated zone structure and delta composition analysis rather than simple boundary touches.
Strategy Integration
Volumetric Supply and Demand Zones fits within institutional footprint and order flow-aware trading approaches:
Fresh Zone Reversal Entries : Enter counter-trend positions at first retest of fresh zones with strong delta confirmation - unfilled institutional orders provide high-probability reaction levels.
POC-Precise Limit Orders : Place entries at POC line rather than zone edges - point of control represents maximum volume concentration, offering tighter stop placement and better risk/reward.
Delta-Filtered Zone Selection : Prioritize demand zones showing positive net delta and supply zones showing negative net delta-aligned pressure composition validates institutional conviction.
Volume Profile Distribution Analysis : Favor zones with tight volume concentration (profile bars clustered) over dispersed distribution - concentrated profiles suggest decisive institutional accumulation/distribution.
Merge-Enhanced Conviction : Treat merged zones with higher volume/delta totals as stronger reversal candidates - combined statistics represent extended institutional activity periods.
Touch Count Degradation Filtering : Reduce position sizing or avoid zones with 3+ touches - excessive interaction depletes institutional orders, weakening reversal probability.
Trend Continuation via Mitigation : Enter breakout positions when price closes beyond supply zones (uptrend) or demand zones (downtrend) - mitigation confirms trend strength overwhelming institutional levels.
Multi-Timeframe Zone Confluence : Apply higher-timeframe zones for macro structure, use lower-timeframe volume profile to identify precise entry levels within larger zones.
Technical Implementation Details
Core Engine : Pivot detection with symmetrical left/right confirmation, ATR-normalized impulse validation
Zone Construction : Base period lookback with ATR-capped height normalization and time-based extension
Volume Profile System : Proportional volume allocation across configurable rows with overlap percentage calculation
Delta Engine : Close-open relationship classification separating buy/sell volume with net delta calculation per row
POC Identification : Maximum volume row detection with visual emphasis rendering
Merge Logic : Overlap detection with gap threshold, boundary expansion, and weighted statistic aggregation
Visualization : Multi-element rendering (zone boxes, profile bars, delta bars, POC lines, info panels) with proportional sizing
Performance Profile : Custom type system for zone/profile/delta management, efficient array-based storage with configurable zone limits
Optimal Application Parameters
Timeframe Guidance:
1 - 5 min : Micro-structure supply/demand for scalping with tight ATR multipliers and reduced lookback
15 - 60 min : Intraday institutional footprint zones with balanced profile row count and merge sensitivity
4H - Daily : Swing-level accumulation/distribution areas with extended lookback periods and wider merge gaps
Weekly - Monthly : Macro institutional zones with maximum profile detail and extended zone persistence
Suggested Baseline Configuration:
Swing Length : 8
Impulse Size (ATR) : 1.2
Base Lookback Candles : 3
ATR Length : 14
Maximum Zone Height (ATR) : 4.0
Maximum Zones : 10
Extend Zones (bars) : 60
Merge Overlapping Zones : Enabled
Merge Gap (ATR) : 0.3
Mitigation Type : Wick
Profile Rows : 10
Profile Width (%) : 0.5
Show POC Line : Enabled
Show Delta Profile : Enabled
Delta Profile Width (%) : 0.35
Show Zone Info Box : Enabled
These suggested parameters should be used as a baseline; their effectiveness depends on the asset's volatility profile, volume characteristics, and preferred zone sensitivity, so fine-tuning is expected for optimal performance.
Parameter Calibration Notes
Use the following adjustments to refine behavior without altering the core logic:
Too many zones cluttering chart : Increase Swing Length (10 - 12) to demand stronger pivots, or increase Impulse Size multiplier (1.5 - 2.0) to require larger moves for zone validation.
Missing significant reversal levels : Decrease Swing Length (5-6) for earlier pivot detection, or reduce Impulse Size (0.8 - 1.0) to capture smaller but valid base formations.
Zones too large/tall : Reduce Maximum Zone Height ATR multiplier (2.5 - 3.0) to cap vertical size, or decrease Base Lookback Candles (1 - 2) for tighter base periods.
Zones too small to be useful : Increase Base Lookback Candles (4 - 6) to encompass longer consolidation periods, or raise Maximum Zone Height (5.0 - 7.0) for taller zones.
Profile bars too granular : Decrease Profile Rows (6 - 8) for coarser distribution showing major volume clusters only.
Profile lacking detail : Increase Profile Rows (15 - 20) for finer resolution revealing subtle volume distribution nuances.
Zones merging too aggressively : Decrease Merge Gap ATR multiplier (0.1 - 0.2) to require tighter overlap for merge qualification, or disable merging entirely.
Related zones not combining : Increase Merge Gap (0.5 - 0.8) to allow merging of zones with larger separation distances.
Zones invalidating prematurely : Switch Mitigation Type from "Wick" to "Close" to require closing violation rather than intrabar penetration.
Zones persisting too long after breach : Switch Mitigation Type from "Close" to "Wick" for faster invalidation on initial penetration.
Profile bars invisible : Increase Profile Width percentage (0.6 - 0.8) for longer bars, improving visibility on cluttered charts.
Delta profile obscuring volume profile : Reduce Delta Profile Width (0.2 - 0.3) to prevent overlap, or disable delta display temporarily.
Adjustments should be incremental and evaluated across multiple session types rather than isolated market conditions.
Performance Characteristics
High Effectiveness:
Range-bound and mean-reverting markets where institutional zones provide reliable turning points
Instruments with consistent volume characteristics where profile distribution reveals true accumulation/distribution
Swing trading approaches targeting zone-to-zone reactions with defined risk parameters
Reversal strategies seeking volume-validated entry levels rather than blind counter-trend positions
Markets where delta proxy correlates well with actual order flow (trending volume instruments)
Position trading benefiting from macro supply/demand structure with embedded volume context
Reduced Effectiveness:
Extremely low volume environments where profile distribution becomes unreliable and sparse
News-driven or gapped markets where zones form/invalidate without normal volume accumulation patterns
Highly trending markets where zones consistently mitigate without providing reversal opportunities
Instruments with erratic volume patterns making delta decomposition and profile interpretation misleading
Very high-frequency timeframes (seconds) where base formation periods too short for meaningful volume accumulation
Integration Guidelines
Confluence : Combine with BOSWaves structure, market profile, or traditional technical analysis for zone validation within broader context
Volume Profile Respect : Trust POC levels and high-volume profile bars over arbitrary zone edges for entry/exit precision
Delta Confirmation Priority : Favor zones where delta composition aligns with expected direction - positive delta in demand, negative delta in supply
Fresh Zone Preference : Prioritize first retests of untouched zones over repeatedly tested areas with high touch counts
Merge Recognition : Treat merged zones with elevated volume/delta statistics as higher-conviction institutional footprint areas
Touch Count Filtering : Reduce position sizing or avoid zones after 3+ touches as institutional order depletion reduces effectiveness
Mitigation Discipline : Exit zone-based positions decisively when price closes beyond boundaries, respecting invalidation signals
Multi-Timeframe Structure : Apply higher-timeframe zones for swing structure, use lower-timeframe profiles for tactical entry refinement
Disclaimer
Volumetric Supply and Demand Zones is a professional-grade supply/demand zone and volume profile analysis tool. It uses volume-based delta proxy to estimate directional pressure but does not access true order book data or institutional trade information. Results depend on market conditions, volume reliability, ATR characteristics, parameter selection, and disciplined execution. Volume profile and delta calculations represent approximations based on close-open relationships and price overlap formulas, not actual bid/ask transactions. BOSWaves recommends deploying this indicator within a broader analytical framework that incorporates price structure, order flow context, and comprehensive risk management.
Pine Script® インジケーター
QuantumPips Session Trend StructureQuantumPips Session Trend Structure is an indicator built to help you read session structure and spot higher-quality breakout → retest opportunities when trend and momentum conditions agree.
It does three main things:
Maps sessions (Asia / London / New York) with live High/Low boxes
Adds trend direction using EMA bias (50/200 + optional slope)
Prints BUY/SELL labels only after a clean breakout + retest sequence, optionally filtered by volume, range expansion (ATR), and candle body strength
Educational tool only — not financial advice. Always manage risk.
What you’ll see on the chart
Session boxes (structure)
The indicator draws a box for each session and updates the session High/Low while the session is active.
Default settings (Timezone Europe/London):
Asia: 00:00–09:00
London: 08:00–17:00
New York: 13:00–22:00
Optional: vertical dotted lines at session starts.
EMA bias (direction)
Two EMAs are plotted:
EMA Fast (50)
EMA Slow (200)
Bias is:
Bullish: EMA50 above EMA200 (and optionally EMA50 rising)
Bearish: EMA50 below EMA200 (and optionally EMA50 falling)
This is designed to reduce counter-trend signals.
The core idea (simple)
Each major session often reacts to the previous session’s range.
This script uses that concept by selecting a reference range:
During London, reference = Asia High/Low
During New York, reference = London High/Low
During Asia (optional), reference = New York High/Low
The panel shows Ref Range, which is just:
Ref Range = Reference High − Reference Low
Signal logic: Breakout → Retest (with confluence)
A signal is only considered when you are inside a session you enabled (Asia/London/NY toggles).
BUY (Long)
Trend bias is Bullish
Price closes above the reference High (breakout)
Price returns to retest near the broken High (ATR tolerance)
Optional: retest candle must close back up (confirm-close)
Optional confirmations pass (volume / expansion / body)
SELL (Short)
Trend bias is Bearish
Price closes below the reference Low (breakout)
Price returns to retest near the broken Low (ATR tolerance)
Optional: retest candle must close back down (confirm-close)
Optional confirmations pass (volume / expansion / body)
This approach is meant to avoid “first-touch” entries and focus on structured moves.
Filters (optional, but useful)
Volume Spike Filter
Requires elevated participation:
volume ≥ SMA(volume) × multiplier
(Volume varies by market/data feed; use discretion on symbols where volume is not meaningful.)
Range Expansion Filter (ATR)
Requires a candle with enough “energy” to avoid weak breakouts:
(high − low) ≥ ATR × range multiplier
Strong Body Filter (optional)
Filters wick-heavy candles around key levels:
body % of candle range ≥ threshold
Side Panel (Top Right) — how to read it
Session
Shows the active session: Asia / London / New York / Off
EMA Bias
Shows: Bullish / Bearish / Neutral
Ref Range
Shows the size of the reference session range being used for the current session:
London uses Asia range
NY uses London range
Asia (optional) uses NY range
Volume
Shows status of the volume filter:
High = passes
Normal = fails
Off = filter disabled
Expansion
Shows status of the ATR expansion filter:
Yes = passes
No = fails
Off = filter disabled
Body
Shows status of the strong-body filter:
Yes = passes
No = fails
Off = filter disabled
Confluence Example
Recommended starting settings
If you want fewer, higher-quality setups:
Enable London + New York
Keep EMA bias ON
Volume filter ON (1.2–1.5×)
Expansion ON (0.8–1.0× ATR)
Body filter optional (0.55–0.70)
Confirm-close ON
If you want more signals:
Lower volume multiplier (1.1–1.2×)
Lower expansion (0.6–0.8× ATR)
Body filter OFF
Best timeframes (TF) to use
Best overall: 5m, 15m, 30m
Best Pairs for Sessions: EURUSD, GBPUSD, GBPJPY, USDJPY, XAUUSD
Pine Script® インジケーター
Daily Bias Trade Manager [MarkitTick]💡 The Daily Bias Trade Manager is a sophisticated technical analysis suite designed to automate the identification of high-probability intraday setups based on liquidity concepts and structural shifts. By synthesizing Previous Day High/Low (PDH/PDL) interactions with momentum confirmation and strict risk management protocols, this tool assists traders in navigating the "Daily Bias." It moves beyond simple signal generation by offering a complete trade management visualization system, projecting entries, stop losses, and take-profit levels directly onto the chart in real-time.
✨ Originality and Utility
This script distinguishes itself by integrating institutional price action theory—specifically Liquidity Sweeps and Change in State of Delivery (CISD)—with mechanical filtering. While many indicators simply highlight highs and lows, the Daily Bias Trade Manager validates these levels by analyzing what happens *after* price tests them.
It solves a common problem for intraday traders: "Analysis Paralysis." By automating the detection of structure breaks (MSS) and Fair Value Gaps (FVG) following a sweep of daily liquidity, it provides an objective framework for entry. Furthermore, the built-in "Position Box" feature removes the guesswork from trade execution by instantly calculating risk-to-reward ratios and visualizing them, allowing traders to see the feasibility of a trade before execution.
🔬 Methodology and Concepts
The core logic operates on a sequential detection model:
Liquidity Identification: The script first plots the Previous Day High (PDH) and Previous Day Low (PDL). These are critical institutional reference points where stop-loss orders (liquidity) often reside.
The Sweep: A "Sweep" is confirmed when price breaches a PDH/PDL but fails to sustain the breakout, closing back inside the previous day's range. This suggests a "Fake-out" or liquidity grab, often a precursor to a reversal.
Change in State of Delivery (CISD): Following a sweep, the script monitors local market structure. It looks for a decisive close past a recent swing point (Swing High for shorts, Swing Low for longs) within a user-defined bar window. This confirms that the counter-trend move has momentum.
Confluence Filtering: To reduce false positives, the engine applies optional filters:
RVOL (Relative Volume): Ensures the sweep occurred on significant volume (Climax behavior).
RSI Momentum: Verifies that momentum supports the reversal direction.
Trend Filter: Uses a long-term EMA to ensure trades align with the broader market direction.
Entry Model: Upon validation, the script calculates an entry at the close (or optionally at a Fair Value Gap), places a Stop Loss at the sweep extreme, and projects three Take Profit targets based on configurable R:R ratios.
🎨 Visual Guide
The indicator uses a distinct color-coded system to keep the chart clean yet informative:
● Liquidity Levels & Sweeps
Orange/Blue Lines: Represent the PDH (Previous Day High) and PDL (Previous Day Low).
Teal Shaded Zones: Indicate a "Buy-Side Sweep" (Price took highs and rejected).
Red Shaded Zones: Indicate a "Sell-Side Sweep" (Price took lows and rejected).
● Position Management Boxes
When a signal triggers, a structured box appears:
Solid Gray Line: The theoretical Entry Price.
Solid Red Line: The Stop Loss (SL), typically placed at the swing high/low of the sweep.
Dashed Blue Lines: Represent TP1, TP2, and TP3 targets based on Reward-to-Risk settings.
Labels: Data tags on the right side of the box show exact price coordinates for Entry, SL, and Targets.
● Signals & Clouds
Green "BUY" Labels: Appear below the bar when a bullish sweep and structural shift are confirmed.
Red "SELL" Labels: Appear above the bar when a bearish sweep is validated.
Yellow Clouds: Highlight Fair Value Gaps (FVG) used for entry confluence or retests.
● Multi-Timeframe (MTF) Dashboard
A panel (default: Top Right) displays the status of up to three higher timeframes.
Trend: Shows "BULL" or "BEAR" based on EMA alignment.
Liquidity: Indicates if the timeframe is "Taking Buy Liq", "Taking Sell Liq", or "Inside Range".
📖 How to Use
● Bullish Reversal Setup
Wait for price to drop below the Blue PDL Line.
Look for a Red Sell-Side Sweep Zone to form, indicating price has rejected lower prices.
Wait for the Green BUY Signal . This confirms a shift in structure (CISD) back to the upside.
Observe the Position Box. If the Risk/Reward is favorable (targets are within reasonable reach), consider the trade.
Optional: Use the "Dynamic Targets" setting to target the previous swing high instead of a fixed ratio.
● Bearish Reversal Setup
Wait for price to rally above the Orange PDH Line.
Look for a Teal Buy-Side Sweep Zone .
Wait for the Red SELL Signal confirming the rejection.
Ensure the dashboard shows alignment (e.g., Higher Timeframe Trend is Bearish) for higher probability.
● Trade Management
Enable the "ATR Trailing Stop" in settings to have the Stop Loss line dynamically adjust as price moves in your favor, locking in potential gains.
⚙️ Inputs and Settings
● General & Display
Show Daily Liquidity: Toggles the PDH/PDL lines.
Max Signals/Zones: Limits the visual clutter by restricting historical shapes.
● Detection Logic
Swing Detection Length: Controls the sensitivity of pivot points. Higher numbers = fewer, more significant swings.
CISD Window: How many bars after a sweep are allowed for the structure shift to occur.
Use FVG Entry: If true, the signal waits for a retest of a gap rather than entering immediately at the close.
● Filters
Volume (RVOL): Requires the sweep candle volume to be X times larger than average.
Trend Filter: Only allows Buy signals above the EMA and Sell signals below it.
Session Filter: Restricts signals to specific hours (e.g., New York Killzone).
● Targets & Management
Target R:R: Sets the multiplier for TP1, TP2, TP3 relative to the stop loss distance.
Use Dynamic Targets: Targets structural liquidity (Previous Highs/Lows) instead of fixed math ratios.
ATR Trailing Stop: Activates the trailing stop mechanism.
🔍 Deconstruction of the Underlying Scientific and Academic Framework
This indicator is grounded in the principles of Market Microstructure and Mean Reversion theory .
1. Liquidity Pools & Stop Runs:
Academic literature on market microstructure suggests that order flow clusters around obvious visual references (PDH/PDL). Large market participants often utilize this "resting liquidity" to fill large block orders with minimal slippage. The "Sweep" logic detects this absorption phase.
2. Volatility Breakout vs. Fake-out:
The script differentiates between a genuine breakout and a mean-reverting "fake-out" by analyzing the Close relative to the Range . A close back within the prior day's range after a breach signifies a failure of auction in the new territory, statistically increasing the probability of a reversion to the mean (equilibrium).
3. Momentum Validation (RSI & RVOL):
By integrating Relative Volume (RVOL) and RSI, the script applies statistical significance testing to the price action. High volume at a range extreme without price progress (the sweep) indicates "Stopping Volume" or absorption, a key concept in Volume Spread Analysis (VSA).
🙏 Gratitude
I would like to express my gratitude to harry040708 for sharing the insightful idea that made this script possible.
⚠️ Disclaimer
All provided scripts and indicators are strictly for educational exploration and must not be interpreted as financial advice or a recommendation to execute trades. I expressly disclaim all liability for any financial losses or damages that may result, directly or indirectly, from the reliance on or application of these tools. Market participation carries inherent risk where past performance never guarantees future returns, leaving all investment decisions and due diligence solely at your own discretion.
Pine Script® インジケーター
Trade by Design - v0.0.1Trade by Design - v0.0.1
📊 Overview
This indicator displays key price levels based on New York trading session times (17:00 NYT). It helps traders identify important support and resistance levels from the previous day, previous week, and the current trading day.
💡 Inspiration
This indicator was inspired by concepts presented in this video: www.youtube.com
Thanks to Annii, her youtube channel is www.youtube.com
Also you can check this video about Mastering the UK session www.youtube.com
I created this indicator for my personal trading needs and decided to share it with the community. Please note that this indicator is in its early development stage (v0.0.1) and may be updated or improved over time based on feedback and my trading experience.
📈 What It Displays
1. Previous Week Levels (HoW / LoW) - Orange
HoW (High of Week): The highest price reached during the previous week
LoW (Low of Week): The lowest price reached during the previous week
Week starts at Sunday 17:00 New York Time
2. Previous Day Levels (HoD / LoD) - Aqua/Cyan
HoD (High of Day): The highest price reached during the previous trading day
LoD (Low of Day): The lowest price reached during the previous trading day
Trading day starts at 17:00 New York Time (aligned with futures market open)
3. Initial Day Levels (iH / iL) - Green
iH (Initial High): The current day's running high
iL (Initial Low): The current day's running low
Displays the percentage range between iH and iL in parentheses
Optional: Include or exclude the gap period (17:00-20:00 NYT)
⚙️ Settings
Colors
Prev Week (LoW/HoW): Color for weekly levels (default: orange)
Prev Day (LoD/HoD): Color for daily levels (default: aqua)
Initial Day (iL/iH): Color for current day levels (default: green)
Style
Line width: Thickness of the lines (1-5)
Line transparency: Transparency for current lines (0-90%)
Historical line transparency: Additional transparency for historical lines (0-90%)
Line style: Solid, Dashed, or Dotted
Label offset: Distance of labels from current price (in bars)
Label size: Tiny, Small, Normal, or Large
History
Number of weeks to display: How many weeks of historical data to show (1-10)
Show historical HoD/LoD: Toggle to show/hide previous days' HoD/LoD levels
Show historical iH/iL: Toggle to show/hide previous days' iH/iL levels
Initial Day (iH/iL)
Include gap (17:00-20:00 NYT):
✅ Checked: iH/iL calculation starts at 17:00 NYT
❌ Unchecked: iH/iL calculation starts at 20:00 NYT (excludes pre-market gap)
🕐 Time Reference
All times are based on New York Time (America/New_York timezone):
17:00 NYT: Start of the trading day (aligned with futures/forex session)
20:00 NYT: Alternative start time for iH/iL when gap is excluded
📝 Label Naming Convention
Current Levels:
HoW, LoW (Previous Week)
HoD, LoD (Previous Day)
iH, iL (Current Day) - includes percentage range
Historical Levels (when enabled):
HoW2, LoW2, HoW3, LoW3... (Older weeks)
HoD2, LoD2, HoD3, LoD3... (Older days)
iH1, iL1, iH2, iL2... (Previous days' initial ranges)
🎯 How to Use
Support & Resistance: Use HoW/LoW and HoD/LoD as potential support and resistance levels
Range Trading: Monitor the iH/iL percentage to gauge daily volatility
Breakout Trading: Watch for price breaking above HoD/HoW or below LoD/LoW
Multi-Timeframe Analysis: Enable multiple weeks to see longer-term levels
⚠️ Disclaimer
This indicator is in early development (v0.0.1) and was created for personal trading use
Past price levels do not guarantee future support/resistance
Always use proper risk management and combine with other analysis methods
This is not financial advice - trade at your own risk
🔄 Version History
v0.0.1 (Current)
Initial release
Previous week high/low (HoW/LoW)
Previous day high/low (HoD/LoD)
Initial day high/low (iH/iL) with percentage range
Multiple weeks history support
Customizable colors, transparency, and label sizes
Gap inclusion/exclusion option for iH/iL
💬 Feedback
This indicator is a work in progress. If you have suggestions for improvements or find any issues, please leave a comment below. Your feedback helps make this tool better for everyone!
Happy Trading! 📈
Pine Script® インジケーター
Daily Levels & MAs on intraday timeframeDaily Levels & MAs - Professional Key Level Tracker
📊 OVERVIEW
A comprehensive indicator that displays critical daily moving averages and key price levels all in one clean view. Perfect for traders who need to see support/resistance zones and trend indicators without cluttering their charts.
🎯 WHAT IT SHOWS
Seven essential reference levels:
- 50 SMA (Daily Simple Moving Average) - Yellow
- 21 EMA (Daily Exponential Moving Average) - Red
- 9 EMA (Daily Exponential Moving Average) - White
- Prior Day High (PDH) - Green
- Prior Day Low (PDL) - Purple/Magenta
- Premarket High (PM High) - Purple
- Premarket Low (PM Low) - Orange
✨ KEY FEATURES
✓ All lines extend to the right with clear price labels
✓ Daily moving averages calculated from daily timeframe data
✓ Prior Day High/Low tracks ONLY regular trading hours (9:30 AM - 4:00 PM)
✓ Premarket levels capture 4:00 AM - 9:30 AM price action
✓ Dotted line style keeps chart clean and readable
✓ Semi-transparent labels don't obstruct price action
✓ Works on ALL intraday timeframes
✓ Auto-updates throughout the day
🔧 TECHNICAL SPECIFICATIONS
- Lines start from beginning of current trading session
- Labels positioned 10 bars to the right of current price
- Max lines: 500 (efficient performance)
- No repainting - uses confirmed historical data
- Premarket lines remain visible during regular hours
📈 IDEAL FOR
- Day traders tracking intraday support/resistance
- Swing traders monitoring key daily trend levels
- Gap traders who need premarket reference points
- Breakout traders watching PDH/PDL violations
- Trend followers using EMA crossovers
💡 HOW TO USE
**Moving Averages:**
- 50 SMA: Long-term trend direction
- 21 EMA: Medium-term momentum
- 9 EMA: Short-term trend and quick reversals
**Price Levels:**
- PDH/PDL: Yesterday's trading range boundaries
- PM High/Low: Today's premarket extremes
- Watch for breaks above/below these levels for potential momentum
🎨 COLOR CODING
- Yellow: 50 SMA (major trend)
- Red: 21 EMA (medium trend)
- White: 9 EMA (fast trend)
- Green: Prior Day High
- Purple/Magenta: Prior Day Low
- Purple: Premarket High
- Orange: Premarket Low
⚙️ SMART FEATURES
- Prior Day calculations exclude premarket/afterhours noise
- Premarket levels reset daily at 4:00 AM
- All levels visible simultaneously without overlap confusion
- Labels show exact price values for precision entries/exits
- Lines automatically adjust length as trading day progresses
📊 TRADING STRATEGIES
**Breakout Trading:**
- Long above PDH with volume confirmation
- Short below PDL with momentum
**Mean Reversion:**
- Fade extremes back to moving averages
- Look for price rejections at PM High/Low
**Trend Following:**
- Buy pullbacks to 9 EMA in uptrends (price above 21/50)
- Sell rallies to 9 EMA in downtrends (price below 21/50)
**Gap Trading:**
- Compare open to PDH/PDL
- Use PM levels to gauge early sentiment
🔒 NO CONFIGURATION NEEDED
Simply add to your chart and start trading! The indicator automatically:
1. Calculates daily moving averages from higher timeframe
2. Tracks prior day regular hours high/low
3. Monitors current premarket session extremes
4. Displays everything with clear labels and prices
Perfect for professional traders who want institutional-grade levels without the complexity!
Pine Script® インジケーター
Daily Bias Panel (with MTF Toggle)Daily Bias Panel Documentation
Overview
The Daily Bias Panel is a TradingView indicator designed to provide a structured, multi factor assessment of market direction for intraday and swing traders. It consolidates several key bias components—Prior Day levels, VWAP, Overnight High/Low, Multi Timeframe Market Structure, and an Overall Bias—into a clean, compact table. A confidence meter summarizes the combined strength of all signals.
This document explains each line item, the rules behind it, and how to interpret the panel.
1. Prior Day Bias
Definition
Compares the current price to the previous day’s high and low.
Rules
• Bullish (1): Close > Prior Day High
• Bearish (-1): Close < Prior Day Low
• Neutral (0): Price is between the prior high and low
Interpretation
This bias reflects whether the market is breaking out above or below the previous day’s range. It is a foundational directional signal.
2. VWAP Bias
Definition
Measures whether price is trading above or below the Volume Weighted Average Price.
Rules
• Bullish (1): Close > VWAP
• Bearish (-1): Close < VWAP
• Neutral (0): Price is at VWAP
Interpretation
VWAP is a widely used institutional benchmark. Trading above VWAP suggests buyers are in control; below VWAP suggests sellers dominate.
3. ONH / ONL Bias (Overnight High / Low)
Definition
Tracks the overnight session’s high and low (18:00–09:30 ET) and compares current price to those levels.
Rules
• Bullish (1): Close > Overnight High
• Bearish (-1): Close < Overnight Low
• Neutral (0): Price is inside the overnight range
Interpretation
ONH/ONL is extremely important for index futures (ES/NQ). Breaking ONH/ONL often signals strong directional intent at the RTH open.
4. Struct MTF (Market Structure Bias)
Definition
A weighted blend of market structure trends across multiple timeframes.
Modes
Swing Mode
• 4H (50%)
• 1H (30%)
• 15M (20%)
Intraday Mode
• 1H (40%)
• 15M (35%)
• 5M (25%)
Rules
Each timeframe is classified as:
• Bullish (1): Higher High + Higher Low
• Bearish (-1): Lower High + Lower Low
• Neutral (0): No clear structure
The weighted average produces a final structure score.
Interpretation
This is your trend engine. It smooths noise and provides a stable directional backbone.
5. Overall Bias
Definition
A strict agreement filter between Prior Day Bias and VWAP Bias.
Rules
• Bullish (1): Both Prior Day and VWAP are bullish
• Bearish (-1): Both are bearish
• Neutral (0): Any disagreement
Interpretation
This prevents false positives by requiring alignment between two major bias components.
6. Confidence Score
Definition
A weighted blend of all bias components:
• Prior Day (25%)
• VWAP (25%)
• ONH/ONL (20%)
• MTF Structure (30%)
Output
A normalized score between -1.00 and +1.00.
Interpretation
• +1.00: Strong bullish alignment across all systems
• -1.00: Strong bearish alignment
• 0.00: Mixed or unclear conditions
7. Confidence Meter (10 Square Visual)
Definition
A visual representation of the confidence score.
Rules
• 0–10 squares filled based on absolute confidence
• Color reflects direction (green/red/yellow)
Interpretation
A quick glance gauge of trend strength.
8. Debug Mode (Optional)
Purpose
Displays all underlying levels and bias markers directly on the chart.
Includes
• Prior High / Low
• VWAP
• ONH / ONL
• Confidence Score line
• Bias markers (P, V, O, M)
Use Case
Great for verifying logic, backtesting visually, and understanding how each component behaves.
9. Panel Layout & Spacing
Top Left Spacer System
When the panel is placed in the top left corner, a 3 row spacer pushes it below the chart header and indicator dropdown.
Panel Size Options
• Small
• Medium
• Large
These adjust font sizes and meter padding.
______________________________________________________________________________
Summary
The Daily Bias Panel is a compact, multi factor decision tool that blends:
• Prior Day context
• VWAP positioning
• Overnight session dynamics
• Multi timeframe trend structure
• A strict overall bias filter
• A confidence scoring engine
Together, these components give traders a clear, structured view of market direction and strength.
This documentation should serve as a complete reference for understanding, using, and publishing the indicator.
Pine Script® インジケーター
My script// @version=6
indicator("ORB-FVG-Sweep Alert", overlay=true)
start = input.session("2300-2330", title="ORB session UTC")
level = input.float(2.0, "Min FVG size ($)")
// ---- ORB box ----
t = time(timeframe.period, start)
inRange = not na(t)
h = ta.valuewhen(inRange, high, 0)
l = ta.valuewhen(inRange, low, 0)
plot(inRange ? h : na, color=color.gray, style=plot.style_linebr)
plot(inRange ? l : na, color=color.gray, style=plot.style_linebr)
// ---- FVG detection (simplified) ----
fvg = (high < low and close < open ) or (low > high and close > open )
plotshape(fvg and math.abs(high -low ) >= level, style=shape.triangleup, location=location.belowbar, color=color.green, size=size.tiny, title="Bull FVG")
plotshape(fvg and math.abs(low -high ) >= level, style=shape.triangledown,location=location.abovebar, color=color.red, size=size.tiny, title="Bear FVG")
// ---- Sweep of ORB high/low ----
sweepHigh = high > h and close < h and high <= h
sweepLow = low < l and close > l and low >= l
plotshape(sweepHigh, style=shape.arrowdown, location=location.abovebar, color=color.maroon, size=size.small, title="Sweep High")
plotshape(sweepLow, style=shape.arrowup, location=location.belowbar, color=color.green, size=size.small, title="Sweep Low")
// ---- Combined alert condition ----
alertcondition(sweepHigh and fvg, title="Short setup", message="ORB sweep+FVG short")
alertcondition(sweepLow and fvg, title="Long setup", message="ORB sweep+FVG long")
Pine Script® インジケーター
MB-MACD## Description
**MB-MACD** is a custom Pine Script indicator designed to enhance momentum analysis by combining a volume-based "Main Buy Ratio" (MB) calculation with a traditional MACD oscillator. The MB Ratio estimates institutional buying pressure by apportioning volume based on the candle's range and close position, providing a unique proxy for "smart money" flow. This smoothed MB value is then used as the source for MACD computation, allowing for divergence detection between price action, the MB line, and the MACD Histogram.
Key features include:
- **MB Line**: A histogram-style plot showing smoothed buy/sell ratio, colored bullishly (teal) or bearishly (pink) based on direction.
- **MACD Histogram**: Standard MACD applied to the MB source, with optional smoothing.
- **Divergence Detection**: Identifies bullish and bearish divergences on both the MB line and MACD Histogram, with configurable filters for momentum decay and zero-line alignment.
- **Visualization Options**: Display divergence lines and labels in the indicator pane or synced as an overlay on the main chart for better context.
- **Alerts**: Triggers for bullish or bearish divergences to notify users of potential reversal setups.
This indicator is particularly useful for swing traders and momentum followers looking to spot hidden divergences that may signal trend reversals or continuations. It emphasizes risk management by highlighting where price and momentum decouple, but remember: divergences are probabilistic signals and should be confirmed with other tools.
As this is a community-shared script, I encourage users to test it thoroughly and provide feedback. If you spot any bugs, calculation errors, or improvements (e.g., edge cases with low-volume symbols or performance issues on certain timeframes), please comment below or reach out—your input helps refine it for everyone!
## User Manual
### Introduction
The **MB-MACD** indicator integrates volume analysis with MACD to detect divergences in price and momentum. The core innovation is the "Main Buy Ratio" (MB), which approximates buying vs. selling volume within each bar based on its range and close position. This MB value is smoothed and fed into a MACD calculation, enabling divergence scans on both the MB line and the resulting MACD Histogram.
Divergences occur when price makes higher highs/lower lows, but the oscillator (MB or Histogram) fails to confirm—often signaling potential reversals. The script offers flexible display options, filters to reduce false positives, and alerts for real-time notifications.
**Important Notes:**
- This is not financial advice; use it for educational purposes and backtest on your symbols/timeframes.
- Works best on liquid stocks or indices with reliable volume data (e.g., daily or higher timeframes).
- Performance may vary on low-volume assets or during after-hours trading.
- If you encounter issues (e.g., no divergences detected or rendering errors), check your chart settings and report them in the comments for community debugging.
### Inputs Explanation
The inputs are grouped for ease of configuration. Adjust them via the indicator's settings panel in TradingView.
#### Core Parameters
- **Show MB Line** (Default: True): Enables/disables the MB Ratio histogram plot.
- **Show MACD Histogram** (Default: True): Enables/disables the MACD line and histogram plots.
- **MB Smoothing (SMA)** (Default: 10, Min: 1): Length for smoothing the raw MB Ratio using a Simple Moving Average (SMA). Higher values reduce noise but may lag.
- **Pivot Lookback Length** (Default: 5, Min: 2): Bars to look back/forward for detecting price pivots (highs/lows) used in divergence logic.
- **Max Lines Kept** (Default: 100, Min: 10): Limits the number of divergence lines/labels to prevent chart clutter.
#### Display Settings
- **Show Lines (Indicator Pane)** (Default: True): Draws divergence lines on the MB line in the indicator pane.
- **Show Labels (Indicator Pane)** (Default: True): Adds labels (e.g., "L" for line divergence) at divergence points in the pane.
- **Show Hist Divergence Lines** (Default: True): Draws dashed lines for MACD Histogram divergences in the pane.
- **Show Hist Divergence Labels** (Default: True): Adds labels (e.g., "H" for histogram divergence) in the pane.
- **Sync Lines to Main Chart (Overlay)** (Default: True): Mirrors divergence lines and labels onto the main price chart for context (slightly offset for visibility).
#### Filters & Tolerance
- **Peak Alignment Tolerance (Bars)** (Default: 5, Min: 0): Allows flexibility in matching oscillator peaks/valleys to price pivots (e.g., within ±5 bars).
- **Max Divergence Distance (Bars)** (Default: 20, Min: 5): Maximum bars between two pivots for a valid divergence; prevents detecting overly distant signals.
- **Enable Momentum Decay Filter** (Default: True): For Histogram divergences, requires the current peak/valley to have a smaller absolute value than the previous (indicating convergence/decay).
- **Enable Zero-Side Filter** (Default: False): Ensures both peaks/valleys in a divergence are on the same side of the zero line (e.g., both positive or both negative).
#### MACD Settings
- **MACD Fast Length** (Default: 12): Fast EMA length for MACD.
- **MACD Slow Length** (Default: 26): Slow EMA length for MACD.
- **MACD Signal Length** (Default: 9): Smoothing length for the MACD signal line.
- **MACD Source Smoothing** (Default: 3, Min: 1): Additional SMA smoothing applied to the MB Ratio before MACD calculation.
### How It Works
1. **MB Ratio Calculation**: For each bar, the script computes the position of the close within the high-low range (0-1). This scales the volume into "buy" and "sell" portions, then derives a net ratio (-100% to +100%). It's smoothed via SMA for the final MB line.
2. **MACD Application**: The (optionally smoothed) raw MB is used as the MACD source, producing a MACD line, signal line, and histogram.
3. **Pivot Detection**: Uses Pine's `ta.pivothigh`/`ta.pivotlow` to find price highs/lows over the lookback period.
4. **Divergence Scanning**:
- **Bearish (on Highs)**: Price makes a higher high, but MB/Hist makes a lower high.
- **Bullish (on Lows)**: Price makes a lower low, but MB/Hist makes a higher low (closer to zero).
- Scans nearby bars for oscillator matches and applies filters.
5. **Rendering**: Lines/labels are drawn in the indicator pane or overlaid on the chart. Colors: Teal for bullish, Pink/Maroon for bearish.
6. **Cleanup**: Automatically removes old lines/labels to stay under the max limit.
### Interpreting the Outputs
- **MB Line (Columns)**: Positive (teal) indicates net buying pressure; negative (pink) shows selling. Watch for crossovers above/below zero as momentum shifts.
- **MACD Histogram (Area)**: Green/teal for positive momentum; red/maroon for negative. Widening bars suggest strengthening trends; narrowing indicates weakening.
- **Divergence Lines/Labels**:
- Solid lines: MB line divergences (thicker, labeled "L").
- Dashed lines: Histogram divergences (thinner, labeled "H").
- Bullish: Teal lines sloping up (potential bottom reversal).
- Bearish: Pink lines sloping down (potential top reversal).
- **Overlay on Chart**: Lines connect price pivots (or offset slightly for Histogram). Use this to visualize how divergences align with candlesticks.
- **Zero Line**: Gray horizontal line; divergences filtered by side if enabled.
**Example Usage**:
- On a daily stock chart, enable overlays and watch for a bullish "L" or "H" label near a price low—could signal a buy if confirmed by volume breakout.
- In a downtrend, bearish divergences on highs might warn of further downside.
### Alerts
- **Bullish Divergence (L or H)**: Triggers on any detected bullish divergence (MB or Histogram).
- **Bearish Divergence (L or H)**: Triggers on bearish divergences.
- Set up via TradingView's alert menu: Select the indicator, choose the condition, and customize the message (e.g., includes ticker).
### Troubleshooting / Known Issues
- **No Divergences Shown**: Increase "Peak Alignment Tolerance" or reduce filters. Ensure pivot length suits your timeframe (shorter for intraday).
- **Too Many Lines/Labels**: Lower "Max Lines Kept" or increase "Max Divergence Distance" to filter distant signals.
- **Performance on Low-Volume Symbols**: MB Ratio may be unreliable; test on high-volume assets first.
- **Rendering Errors**: If lines don't appear, check chart zoom or ensure "force_overlay=true" isn't conflicting with other indicators.
- **NaN/Undefined Values**: Rare on live data but possible in historical backtests; report with symbol/timeframe for fixes.
### Feedback and Contributions
This script is open for community improvement! If you find bugs (e.g., false positives in divergences, calculation edge cases, or UI glitches), or have suggestions (like additional filters or visualizations), please share in the comments. Your feedback helps make it better—let's debug and enhance it together!
Pine Script® インジケーター
Sessions and Killzones [Tradeuminati]Tradeuminati – Sessions & Killzones is a New York local time based session toolkit designed for traders who want clean, objective session structure on their chart: session boundaries, killzones, session highs/lows, and previous day levels plus a live “liquidity taken” checklist.
Key Features
1) Sessions (New York Time)
London Session (0:00 – 6:00 NY)
- Vertical start/end lines
- Live session High and Low tracking during the session
- High/Low levels extend until 16:00 NY
- Labels: Ls - H and Ls - L
- Option to display only the current day
Asia Session (Previous Day, 18:00 – 00:00 NY)
- Vertical start/end lines for the previous day session
- Live session High and Low tracking
- High/Low levels extend into the next day until 16:00 NY
- Labels: As - H and As - L
- Option to display only the current day
2) Killzones (New York Time)
London Killzone: 2:00 – 5:00 NY
- Optional DAX-only mode: If enabled, DAX uses 3:00 – 5:00 NY (DAX opening), while other assets remain 2:00 – 5:00 NY
New York Killzone (auto-adjust by asset type)
- Indices: 9:30 – 11:00 NY
- Other assets (FX / Commodities / Crypto): 7:00 – 10:00 NY
New York PM Killzone: 14:00 – 15:00 NY (all assets)
ll killzone lines are placed from the start of the NY day, so you can see upcoming killzones in advance (not only after candles appear).
3) Previous Day High / Low (PDH / PDL)
- Automatically calculates the full previous NY day range (00:00 – 23:59 NY)
- Plots PDH and PDL into the current day
- Labels: PDH and PDL
4) Live “Liquidity Taken” Table
- A compact table in the bottom-left shows whether price has:
- swept Asia High / Asia Low
- swept London High / London Low
- taken PDH / PDL
A green checkmark appears instantly once a level is broken.
Customization
Fully adjustable colors, widths, and line styles for:
- Session vertical lines
- Session high/low lines
- Killzones
- PDH/PDL
Adjustable label size
Day filtering options (current day only)
-----
Disclaimer
This indicator is for educational and technical analysis purposes only. It does not constitute financial or investment advice. Trading involves risk.
Pine Script® インジケーター
Gann Square of Nine: Planetary Degrees█ Gann Square of Nine: Planetary Degrees maps planetary positions onto Gann's Square of Nine grid, tracking where pivot highs and lows accumulate by planetary degree. Use this indicator to identify recurring degree patterns on the So9, determine whether pivots cluster around cardinal, diagonal, or other significant angles, and project when the planet will return to those degrees.
Powered by the open-source BlueprintResearch Planetary Ephemeris library , which implements truncated VSOP87 (planets) and ELP2000 (Moon) series for high-accuracy celestial calculations entirely within Pine Script.
█ FEATURES
• Anchor Point System — Select any significant price pivot (high or low) as your reference point; all subsequent pivot tracking begins from this timestamp
• All 10 celestial bodies — Sun, Moon, Mercury, Venus, Mars, Jupiter, Saturn, Uranus, Neptune, and Pluto
• Geocentric or Heliocentric views — Toggle between Earth-centered (traditional) and Sun-centered perspectives
• Interactive Square of Nine table — Visual grid displaying the Gann spiral pattern with highlighted pivot degrees
• Automatic pivot detection — Configurable bar sensitivity to identify price pivots (symmetric left/right)
• Pivot degree labeling — Each detected pivot displays the planet's ecliptic longitude (0-360°) at that moment
• Target degree alerts — Define specific So9 degrees to watch; triggers alerts when the planet crosses them
• Preset So9 angles — Quick selection of degrees along major So9 lines (0°, 45°, 90°, 135°, 180°, 225°, 270°, 315°)
• Custom degree input — Enter any degrees as comma-separated or newline-separated values
• Future degree projections — Scans up to 500 bars ahead and shows when the planet will reach each target degree
• Retrograde indicator — Shows ℞ symbol with red text when planets are in apparent retrograde motion
• So9 overlay tools — Plot 90° and 45° angle relationships from any entered degree
█ HOW IT WORKS
The Square of Nine Concept:
Gann's Square of Nine is a spiral grid where numbers flow outward from the center (1) in a square spiral pattern. Key angle relationships (0°, 45°, 90°, etc.) align along specific diagonals and cardinal lines. When planetary degrees land on the same So9 position as significant price pivots, it suggests potential support/resistance levels.
This Indicator:
1. User selects an "anchor" timestamp at a significant price pivot
2. The indicator calculates the selected planet's ecliptic longitude (0-360°) at each bar
3. Price pivots detected after the anchor are labeled with their planetary degrees
4. These degrees accumulate on the So9 grid, revealing patterns
5. Target degrees can be set to receive alerts when crossed
6. Future projections show when the planet will reach those target degrees
█ HOW TO USE
1. Click on the anchor timestamp input and select a significant high or low pivot on your chart
2. Choose "High" or "Low" pivot type based on your anchor point
3. Select your planet from the dropdown
4. Choose Geocentric (traditional) or Heliocentric view
5. The So9 table appears showing accumulated pivot degrees highlighted
6. Set target degrees using presets or custom input to receive crossing alerts
7. Future projections appear as vertical lines with date/time labels
8. Use the So9 overlay tools to visualize angle relationships from specific degrees
█ VISUAL GUIDE
So9 Table Colors:
• Anchor degree: White (⚓ symbol)
• Current planet position: Planet's assigned color with symbol
• Pivot Highs: Green background
• Pivot Lows: Red background
• Equal (both high and low): Orange background
• Diagonal crosses: Blue background
• Cardinal crosses: Red background
• Target degrees: Yellow highlight
Chart Labels:
• Pivot High labels appear above the price with the degree
• Pivot Low labels appear below the price with the degree
• Future projection lines: Yellow (upcoming) or Gray (already crossed since anchor)
█ SETTINGS OVERVIEW
1. Anchor Point — Set the starting pivot timestamp and type (High/Low)
2. Planet Selection — Choose celestial body and coordinate system
3. Target Degree Alerts — Configure which degrees to watch and receive alerts
4. Pivot Detection — Set bar sensitivity for pivot high/low detection and degree rounding precision
5. Visual Style — Customize colors and label sizes
6. So9 Grid Overlay — Enter a degree to visualize its angular relationships
7. So9 Table — Position, sizing, and color options for the grid
8. So9 Diagonals — Toggle and color the diagonal/cardinal cross highlights
█ LIMITATIONS & ACCURACY
This indicator uses optimized VSOP87 and ELP2000 series tailored for Pine Script performance. It delivers excellent accuracy for trading and analytical purposes.
Expected Accuracy:
• Sun, Moon, Mercury, Venus, Mars: Within 1-10 arcseconds
• Jupiter, Saturn: Within 10-30 arcseconds
• Uranus, Neptune: Within 1-2 arcminutes
• Pluto: Simplified Meeus method (valid 1900-2100)
Degree Resolution:
The So9 grid uses integer degrees (1-361). Planetary positions are rounded to the nearest whole degree for grid placement. Precise decimal degrees are retained for crossing calculations and alerts.
Crossing Detection:
Future projection lines and background highlights both point to the confirmation bar—the first bar where the crossing can be verified. Alerts also trigger on this bar. This ensures all visual elements align consistently: when the chart reaches a future projection line, that bar closes with the crossing confirmed and highlighted.
█ CREDITS
• Square of Nine grid visualization adapted from ThiagoSchmitz's "Gann Square of 9" (Feb 2023)
• Ephemeris calculations via BlueprintResearch/lib_ephemeris open-source library
Pine Script® インジケーター
Asian Stop Hunt ModelSTOP HUNT MODEL – STRATEGY DESCRIPTION
The Stop Hunt Model is designed to capture high-probability trades by targeting stop-loss liquidity from retail traders at buy-side and sell-side liquidity zones. The strategy focuses on identifying where liquidity is taken during the Asian session, waiting for a Change of Character (CHoCH), and then entering from unfilled orders (Balanced Price Range / Imbalance) in the direction of the dominant IPDA bias. The objective is to trade from engineered liquidity sweeps toward the next logical liquidity pool, while maintaining strict risk control.
The model operates primarily on the 5-minute chart, with early confirmation on the 3-minute chart. The Asian Killzone is used to define the initial range, plotting its high and low. Higher-timeframe liquidity from Daily, 4H, and 1H charts is marked in advance to provide directional context. IPDA direction is determined using macro alignment such as global interest rate bias and long-term trend behavior.
Once the Asian session concludes, price is expected to sweep either the high or low of the Asian range or the previous day’s high/low. After the liquidity sweep, the market must show a valid CHoCH, confirming a shift in internal structure. Entries are taken only after the formation and retest of a Balanced Price Range (BPR) created by overlapping imbalances. Trades are executed from these imbalance zones, targeting the next liquidity area, with stop loss placed at the most recent swing high or low.
This model prioritizes precision over frequency, aiming for fewer trades with higher reward-to-risk ratios, typically 1:3 or better, and a strict daily risk cap.
CHECKLIST – STOP HUNT MODEL
1.Mark Asian Killzone High and Low
2.Identify IPDA directional bias for the pair
3.Mark Buy-side and Sell-side liquidity from Daily, 4H, and 1H
4.Wait for a liquidity sweep (Asian High/Low or Previous Day High/Low)
5.Confirm a valid CHoCH
6.Identify a valid BPR (overlapping imbalance)
7.Enter trade from the BPR zone
8.Target the next liquidity pool
9.Place stop loss at the last swing high or low
RULES – STOP HUNT MODEL STRATEGY
> Always pre-mark Buy-side and Sell-side liquidity on 1D, 4H, and 1H
> Asian Killzone must complete by 10:30 AM IST
> After Asian close, mark 15-minute timeframe liquidity
> Trade only after the market sweeps the Asian session high or low
> Align trades with IPDA direction:
> Bullish IPDA → Prefer sweep of Asian Low
> Bearish IPDA → Prefer sweep of Asian High
> CHoCH confirmation is mandatory:
> Green CHoCH for bullish setups
> Red CHoCH for bearish setups
Setup conditions:
1. Bullish: CHoCH above price + BPR below price
2. Bearish: CHoCH below price + BPR above price
3.BPR must be formed by overlapping imbalances:
4.Red → Green for bullish
5.Green → Red for bearish
6.Look for V-shaped (bullish) or A-shaped (bearish) candle behavior
7.Entry only on imbalance retest — no chase entries
8.Targets must be killzone extremes or next liquidity zone
9.Stop loss must always be at the last swing high or low
10.No manual exits if aiming for 1:3 RR
11.If price sweeps both sides or no clean sweep occurs → No Trade
12.Trade less, execute cleaner setups
13.Daily target: 1% maximum
Pine Script® インジケーター
Quantum Candle Scanner [JOAT]
Quantum Candle Scanner - Advanced Multi-Pattern Recognition System
Introduction and Purpose
Quantum Candle Scanner is an open-source overlay indicator that detects multiple candlestick patterns including engulfing patterns, kicker patterns, inside bar setups, momentum candles, and higher-high/lower-low sequences. The core problem this indicator solves is that traders often miss patterns because they're looking for only one type. Different patterns work better in different market conditions.
This indicator addresses that by scanning for five distinct pattern types simultaneously, giving traders a comprehensive view of price action signals.
Why These Five Pattern Types Work Together
Each pattern type identifies different market behavior:
1. Engulfing Patterns - Classic reversal signals where current candle completely engulfs the previous candle. Best for identifying potential turning points.
2. Kicker Patterns - Strong reversal signals with gap confirmation. The current candle opens beyond the previous candle's open with opposite direction. Best for identifying high-momentum reversals.
3. Inside Bar Patterns - Consolidation breakout signals where a candle's range is contained within the previous candle, followed by a breakout. Best for identifying compression before expansion.
4. Momentum Candles - Identifies the largest body candle over a lookback period. Best for spotting institutional activity.
5. HH/HL and LH/LL Sequences - Three-bar structure patterns showing trend continuation. Best for confirming trend direction.
How the Detection Works
Engulfing Pattern:
bool engulfBullBase = open <= math.min(close , open ) and
close >= math.max(close , open ) and
isBullish(0) and
getBodyPct(0) > bodyMinPct
Kicker Pattern:
bool kickerBull = isBearish(1) and isBullish(0) and
open > open and low > low and
getBodyPct(0) > 40 and getBodyPct(1) > 40
Inside Bar:
bool insideBarSetup = low < low and high > high
bool insideBarBull = insideBarSetup and isBullish(0)
HH/HL Sequence:
bool hhhlSeq = high > high and low > low and
high > high and low > low and
close > close
Optional Filters
ATR Filter - Only shows patterns where candle body exceeds ATR (strong candles only)
Body Minimum % - Requires minimum body percentage for engulfing patterns
Close Beyond Prior H/L - Requires engulfing candle to close beyond prior high/low
Dashboard Information
Engulfing - Total engulfing patterns detected
Kicker - Kicker pattern count
Inside Bar - Inside bar breakout count
HH/LL Seq - Structure sequence count
Total - Combined pattern count
How to Use This Indicator
For Reversal Trading:
1. Look for engulfing or kicker patterns at key support/resistance
2. Confirm with HH/HL or LH/LL sequence breaking
3. Enter with stop beyond the pattern
For Breakout Trading:
1. Identify inside bar setups (consolidation)
2. Enter on breakout candle in direction of break
3. Use the inside bar range for stop placement
For Trend Confirmation:
1. Use HH/HL sequences to confirm uptrend structure
2. Use LH/LL sequences to confirm downtrend structure
3. Momentum candles indicate institutional participation
Input Parameters
Detect Engulfing/Kicker/Inside Bar/Momentum/HHLL (all true) - Toggle each pattern type
Min Body % for Engulfing (0) - Minimum body percentage
ATR Filter (false) - Only show strong candles
Engulf Must Close Beyond Prior H/L (true) - Stricter engulfing definition
Compact Mode (false) - Shorter labels for cleaner charts
Timeframe Recommendations
1H-Daily: Best for reliable pattern detection
15m-30m: More patterns but higher noise
Use Compact Mode on lower timeframes
Limitations
Pattern detection is mechanical and does not consider context
Not all patterns lead to successful trades
Kicker patterns are rare but powerful
Inside bar breakouts can fail (false breakouts)
Open-Source and Disclaimer
This script is published as open-source under the Mozilla Public License 2.0 for educational purposes.
This indicator does not constitute financial advice. Pattern detection does not guarantee trade outcomes. Always use proper risk management.
- Made with passion by officialjackofalltrades
Pine Script® インジケーター
SMC Market Structure (HH/HL/LH/LL + BOS/CHoCH/MSS)SMC Market Structure (HH/HL/LH/LL + BOS/CHoCH/MSS) is a clean price-action / Smart Money Concepts market structure tool designed to automatically identify and label key structural events on the chart:
Swing structure points: HH, HL, LH, LL
Continuation confirmations: BOS (Break of Structure)
Early reversal warnings: CHoCH (Change of Character)
Stronger reversal signals: MSS (Market Structure Shift) using a displacement filter
The script is built to remain visually tidy: it draws simple horizontal structure lines at the broken swing level and prints small abbreviations (BOS / CHoCH / MSS) directly on the chart without cluttering candles or adding heavy panels.
What the Indicator Detects
1) Swing Points (HH / HL / LH / LL)
Swings are detected using confirmed pivots (left/right “Swing length” bars).
HH (Higher High): a swing high above the previous swing high
LH (Lower High): a swing high below the previous swing high
HL (Higher Low): a swing low above the previous swing low
LL (Lower Low): a swing low below the previous swing low
These labels help define the market’s active structure:
Bullish structure: HH + HL sequence
Bearish structure: LL + LH sequence
Range / consolidation: mixed swing progression
2) BOS (Break of Structure) – Trend Continuation
A BOS prints when price breaks the most recent swing level in the direction of the current structure:
In a bullish market state → break above the most recent swing high
In a bearish market state → break below the most recent swing low
This is typically treated as confirmation that the existing trend is continuing.
3) CHoCH (Change of Character) – Early Reversal Signal
A CHoCH prints on the first break against the current structure:
In a bullish market state → break below the most recent swing low
In a bearish market state → break above the most recent swing high
CHoCH is intended as an early warning that the market may be transitioning into a new directional bias.
4) MSS (Market Structure Shift) – Stronger Reversal via Displacement
MSS is treated as a “strong CHoCH” and requires a decisive, displacement-style candle at the break.
To qualify as MSS, the script requires:
A break against structure with a CLOSE break, and
A displacement candle where:
Candle body > ATR × Displacement Multiplier
This helps filter out shallow wicks or minor liquidity grabs and highlights shifts that show stronger participation and momentum.
How the Indicator Draws on the Chart
When a BOS / CHoCH / MSS occurs:
A horizontal line is drawn from the swing point to the break bar at the broken level.
A small abbreviation label (BOS / CHoCH / MSS) is placed either:
In the middle of the line segment, or
On the break bar (selectable)
Swing labels (HH/HL/LH/LL) are optional and can be disabled for a cleaner “event-only” layout.
Inputs & Settings
Swing Length (Pivot Left/Right)
Controls how sensitive the swing detection is.
Lower values (3–5): more structure points, more signals
Higher values (8–14): fewer, cleaner swings (better for higher timeframes)
Break Confirmation (Wick vs Close)
Wick: break triggers when the candle’s wick crosses the swing level
Close: break triggers only when the candle closes beyond the swing level
Many SMC traders prefer Wick for detecting liquidity runs and early breaks, while others prefer Close to reduce false signals.
MSS Displacement Filter
ATR Length: ATR calculation period
Displacement Multiplier: Minimum body size = ATR × multiplier
Higher multiplier = fewer MSS signals, but stronger quality threshold.
Display Toggles
Show/Hide Swing Labels (HH/HL/LH/LL)
Show/Hide BOS, CHoCH, MSS
Optional EQH/EQL labeling (equal highs/lows)
Visual Controls
Bullish / bearish structure colors
Line width / style
Text offset (in ticks) to keep labels neat above/below level
Maximum structure objects to keep on screen (prevents object-limit issues)
Recommended Usage
Trend Following
Use HH/HL or LL/LH progression to define the trend.
Wait for BOS to confirm continuation.
Use BOS levels as:
Bias confirmation
Potential retest zones
Risk reference for stop placement
Reversal / Shift Detection
Identify prevailing structure (bullish or bearish).
Watch for CHoCH as the first sign of a possible reversal.
Treat MSS as a stronger “shift” event (displacement + close break), often suitable for:
Changing directional bias
Switching from pullback trading to reversal continuation setups
Multi-Timeframe Workflow (Common SMC Method)
Higher timeframe (HTF): use swings and BOS to define macro bias
Lower timeframe (LTF): use CHoCH/MSS to time entries and manage risk
Confirm entries with your preferred tools (order blocks, FVGs, liquidity pools, session timing, etc.)
Notes & Limitations
This script uses confirmed pivots, so swing labels appear only after the swing is fully formed (after Swing length bars). This avoids repainting swing points.
BOS/CHoCH/MSS events are derived from the most recent confirmed swing levels.
MSS requires a close break and displacement threshold even if “Wick” breaks are enabled for other events (by design, to keep MSS strict).
Best Settings by Timeframe (General Guide)
Scalping (1–5m): Swing length 3–5, Wick breaks, MSS multiplier 1.2–1.8
Intraday (15m–1h): Swing length 5–8, Wick or Close, MSS multiplier 1.5–2.0
Swing trading (4h–1D): Swing length 8–14, Close breaks, MSS multiplier 1.8–2.5
Pine Script® インジケーター
Global Sessions Pro NY/London/Tokyo - O/C/H/LGLOBAL SESSIONS PRO — NY / LONDON / TOKYO
Session Opens, Highs, Lows, Midpoints, Closes, Ranges & Killzones
OVERVIEW
Global Sessions Pro is a comprehensive session-mapping indicator designed for traders who rely on market structure, session context, and time-based behavior.
The indicator automatically plots New York, London, and Tokyo sessions, including:
• Session Open, High, Low, Midpoint, and Close
• Prior session levels projected forward
• Session range boxes
• Right-side labeled price levels (clearly identified)
• Stacked session summary labels (no overlap)
• Optional killzones and overlap windows
• Breakout alerts (prior or current session levels)
The script is fully timezone-aware, DST-safe, and works on any chart timeframe.
KEY FEATURES
SESSION MAPPING
For each session (NY / London / Tokyo), the indicator can display:
• Open
• High
• Low
• Midpoint (High + Low) / 2
• Close
Each level is drawn with its own horizontal line and optional right-side label, so there is never confusion about which line represents which level.
SESSION RANGE BOXES
Optional shaded boxes highlight the true session range as it develops in real time.
These are useful for visualizing:
• Compression vs expansion
• Relative session volatility
• Strength or weakness between sessions
Opacity and visibility are fully configurable.
RIGHT-SIDE LEVEL LABELS
Each session level can be labeled on the right edge of the chart, showing:
• Session name (NY / Lon / Tok)
• Level type (O / H / L / M / C)
• Optional price value
Examples:
NY H: 18234.25
Lon L: 18098.50
Tok M: 18142.75
This eliminates ambiguity when multiple session levels overlap or share similar colors.
SESSION SUMMARY LABELS (AUTO-STACKED)
At the top of each session range, an optional summary label displays:
• Session name
• Open / High / Low / Close
• Total range (points)
• Range in ticks
• ATR multiple
Summary labels are automatically stacked vertically using ATR-based or tick-based spacing, preventing overlap even when multiple sessions occur close together.
PRIOR SESSION LEVELS
The indicator can project prior session levels into the next session, including:
• Prior High and Low
• Optional prior Open, Close, and Midpoint
These levels are commonly used for:
• Support and resistance
• Liquidity sweeps
• Mean reversion
• Failed breakouts
Projection length is configurable and safely capped to comply with TradingView drawing limits.
KILLZONES AND SESSION OVERLAPS
Optional background shading highlights key institutional windows:
• London Open
• New York Open
• London / New York overlap
These zones help identify high-probability volatility windows and time-based trade filters.
All killzones respect the selected session timezone basis.
ALERTS
Built-in alerts are available for:
• Break of prior session high
• Break of prior session low
• Break of current session high
• Break of current session low
Alerts can be configured to trigger on wick or close.
Alert logic is written using precomputed crossover detection to ensure historical consistency and avoid missed or false alerts.
TIMEZONE AND SESSION HANDLING (IMPORTANT)
SESSION TIME BASIS OPTIONS
The indicator supports three session-time modes:
Market Local (DST-aware) – Recommended
• New York uses America/New_York
• London uses Europe/London
• Tokyo uses Asia/Tokyo
• Automatically adjusts for daylight saving time
UTC (Fixed)
• Sessions are interpreted strictly in UTC
• Best for crypto or non-DST workflows
• Requires manual adjustment during DST changes
Custom Timezone
• Define a single custom timezone for all sessions
This ensures sessions display correctly regardless of the chart’s timezone.
DEFAULT SESSION TIMES
(Default values assume Market Local (DST-aware) mode)
Tokyo: 09:00 – 15:00
London: 08:00 – 16:30
New York: 09:30 – 16:00
These defaults are optimized for cash and index trading.
FX traders may adjust session windows as needed.
BEST USE CASES
This indicator is particularly effective for:
• Index futures (ES, NQ, RTY, DAX, FTSE)
• Forex session-based strategies
• Time-based breakout systems
• Liquidity sweep and mean-reversion models
• London Open and New York Open trading
• Multi-session market context analysis
PERFORMANCE AND SAFETY NOTES
• All future-drawn objects are capped to comply with TradingView limits
• Crossover logic is evaluated every bar to prevent calculation drift
• Old session drawings are automatically culled to reduce chart clutter
• Works on all intraday and higher timeframes
RECOMMENDED SETTINGS
For most traders:
• Session Time Basis: Market Local (DST-aware)
• Show Open / High / Low / Midpoint: ON
• Prior Session Levels: ON
• Summary Labels: ON
• Killzones: ON
• Alerts: ON (Close-based)
FINAL NOTES
This indicator is designed to provide objective session structure without opinionated trade signals. It works best as a context layer combined with your own execution rules, confirmations, and risk management.
If you trade time, structure, and liquidity, this script provides the framework.
Pine Script® インジケーター
Daily Candle Bias Backtesting Stats @MaxMaserati This indicator, is a powerful backtesting and probability tool designed to quantify the "follow-through" of specific candle types across different market sessions.
It identifies specific price action setups and tracks whether price hits a "Target" (continuation) or an "Invalidation" (reversal) first, providing real-time win rates for your favorite sessions.
The Candle Bias Stats indicator automatically categorizes every candle based on the MMM candle bias and tracks their historical success rate. It calculates how often a candle's high/low is broken before its opposite end is touched. By breaking this data down into sessions (Asian, London, NY), it identifies high-probability "time-of-day" windows where specific price action setups are most reliable.
MMM CANDLE LOGIC
Bullish Expansion & Breakout Signatures
Bullish Body Close Plus (BuBC Plus): Represents strong bullish momentum where price closes above the previous high and near its own top, signaling that buyers are in complete control.
Bullish Body Close Minus (BuBC Minus): Indicates weak bullish momentum; while the price closes above the previous high, a long top wick shows sellers pushed back, suggesting a potential retest of the previous high.
Bearish Expansion & Breakout Signatures
Bearish Body Close Plus (BeBC Plus): A very strong bearish signal where price closes below the previous low and near its own bottom, indicating sellers are dominant.
Bearish Body Close Minus (BeBC Minus): Signifies weak bearish momentum; the price breaks the previous low but finishes with a long bottom wick as buyers push back, often leading to a retest of the old ceiling.
Bullish Reversal & Trap Signatures (Affinity)
Bullish Affinity Plus (BuAF Plus): A strong bullish reversal where a new low is made, but sellers hit a wall and get trapped, causing price to finish near its top with a long bottom wick.
Bullish Affinity Minus (BuAF Minus): A weak bullish bounce where a new low is made and price finishes back inside the previous range, but buyers lack the energy for a significant move.
Bearish Reversal & Trap Signatures (Affinity)
Bearish Affinity Plus (BeAF Plus): A strong bearish reversal; buyers are trapped after making a new high, and price finishes near its bottom with a long top wick.
Bearish Affinity Minus (BeAF Minus): A weak bearish drop where sellers stop the rise but lack the energy to push price significantly lower.
Neutral & Volatility Signatures
Close Inside Bullish (CI•BuAF): Bullish neutral state where price stays inside the previous candle’s range but finishes in the top half, indicating buyers are slightly more active.
Close Inside Bearish (CI•BeAF): Bearish neutral state where price remains inside the previous box and finishes in the bottom half.
Seek & Destroy Bullish (S&D•BuAF): Bullish volatility characterized by price moving above and below the previous candle before buyers win the battle and close price near the top.
Seek & Destroy Bearish (S&D•BeAF): Bearish volatility where sellers win a high-chaos battle, closing price near the bottom after sweeping both sides of the previous candle.
H4 CANDLE EXAMPLE
Deep Dive: Analysis of the 4H Statistics
The image presents a comprehensive backtest of 4,999 total candles from September 2022 to December 2025. Here is the breakdown of what the interface is telling us:
1. The Strategy: Target vs. Invalidation
The indicator tracks BuBC (Bullish Body Close) and BeBC (Bearish Body Close).
The Target: For a Bullish candle, the target is the High. For a Bearish candle, it is the Low.
The Invalidation: The opposite end of the candle (the Low for Bullish, the High for Bearish).
The Goal: To see which level is touched first in the subsequent bars.
2. Global Performance (The Top Right Table)
Looking at the BuBC (1402 samples) section:
Target First (67.8%): In nearly 7 out of 10 cases, once a 4H candle closes "bullish" (breaking the previous high), the price continues higher to break its own high before it ever returns to take out its own low.
Both Hit (17.7%): This is a critical metric. It represents "Stop Runs" or "Wicks" where price hits the target but also hits the invalidation within the same tracking period.
Efficiency (1.3 Bars): This tells us the "follow-through" is almost immediate. If the trade doesn't work within 1 or 2 candles, the statistical edge drops off significantly.
3. The Session Breakdown (The Bottom Left Table)
This is where the "Edge" is found. Not all hours of the day are created equal.
Asian Late (02:00-06:00) – The "Star" Performer: With a 72.9% Target rate, this is labeled "BEST." It has the lowest "Both%" (6.5%), meaning moves during these hours are incredibly "clean." If a setup forms here, price usually moves directly to the target without looking back.
London Open & Overlap (06:00-14:00): These sessions maintain a high win rate (approx. 70%). This suggests that the European session provides reliable trend continuation for the S&P 500.
NY Session (14:00-18:00) – The "Trap" Zone: This is labeled "WORST" for a reason. While the win rate is basically a coin flip (49.6%), the Both% spikes to 36.7%. This means that even if you are right about the direction, the market is highly likely to "sweep" your stop loss before going to the target. It is the most volatile and "fake-out" prone time for this specific setup.
Summary of the Data
The statistics show that the S&P 500 4H Candle Bias is a highly reliable trend-following indicator, provided you trade it at the right time.
The data suggests a clear three-step logic:
Directional Edge: Both Bullish and Bearish body closes have a natural ~67% probability of continuation.
Timing is Everything: Trading during the Late Asian and London sessions increases your probability of success to over 70% with very low risk of a "fake-out."
Risk Warning: Avoid "Body Close" breakout strategies during the NY Mid-day (14:00-18:00). The statistics prove that this window is dominated by "Seek and Destroy" price action, where price is mathematically likely to hit both your target and your stop, usually hitting the stop first.
Pine Script® インジケーター
ORB Breakout & RetestORB Breakout & Breakdown Indicator - Complete Opening Range Strategy
Description :
The ORB (Opening Range Breakout) Breakout & Retest Indicator is a simple tool designed to identify opening range breakouts and breakdowns with retest confirmation. This indicator works on ANY timeframe while automatically analyzing 1-minute price action to detect precise entry signals.
What makes this indicator unique:
- ✅ Multi-Timeframe ORB Analysis - Simultaneously tracks 5-min, 15-min, and 30-min opening ranges
- ✅ Smart Retest Logic - Filters false breakouts by requiring price to retest and confirm the level
- ✅ Works on Any Chart Timeframe - View on 5-min, 15-min, 1-hour, or daily charts while getting 1-minute precision
- ✅ Both Long & Short Signals - Detects bullish breakouts AND bearish breakdowns
- ✅ Customizable Alerts - Get notified when confirmed setups occur
- ✅ Clean Visual Display - Compact table showing all ORB levels and signal status
How it Works:
Opening Range Detection :
- 5-Min ORB: Captures high/low from 9:30-9:35 AM
- 15-Min ORB: Captures high/low from 9:30-9:45 AM
- 30-Min ORB: Captures high/low from 9:30-10:00 AM
Breakout Confirmation (3-Step Process) :
1. Initial Break - Price closes above ORB High (or below ORB Low for shorts)
2. Retest - Price pulls back to retest the broken level
3. Confirmation - Price breaks through again, confirming the trend
This retest requirement dramatically reduces false signals and helps you enter trades with better risk/reward.
Perfect For :
- Day traders looking for opening range strategies
- Scalpers who need precise entry signals
- Swing traders identifying strong intraday momentum
- Anyone trading stocks, futures, forex, or crypto during market hours
---
⚙️ Settings & Customization :
Display Options :
- ☑️ Show ORB High (Default: OFF) - Display the high of each opening range in the table
- ☑️ Show ORB Low (Default: OFF) - Display the low of each opening range in the table
- ☑️ Show Breakout+Retest (Default: ON) - Show bullish breakout confirmation status
- ☑️ Show Breakdown+Retest (Default: ON) - Show bearish breakdown confirmation status
Alert Options :
- ☑️ Enable 5-Min Alerts (Default: OFF) - Get alerts for 5-minute ORB confirmations
- ☑️ Enable 15-Min Alerts (Default: OFF) - Get alerts for 15-minute ORB confirmations
- ☑️ Enable 30-Min Alerts (Default: OFF) - Get alerts for 30-minute ORB confirmations
Visual Indicators :
- Green triangles (▲) below bars = Breakout confirmed (bullish)
- Red triangles (▼) above bars = Breakdown confirmed (bearish)
- Triangle sizes: Tiny (5-min), Small (15-min), Normal (30-min)
---
Table Legend:
Timeframe Row: Shows the three ORB periods being tracked
ORB High Row: (Optional) The highest price during each opening range period
ORB Low Row: (Optional) The lowest price during each opening range period
Breakout+Retest Row:
- 🟢 YES = Bullish setup confirmed (price broke high, retested, and confirmed)
- 🔴 NO = No confirmed bullish setup yet
- ⚪ N/A = Opening range not yet established
Breakdown+Retest Row:
- 🟢 YES = Bearish setup confirmed (price broke low, retested, and confirmed)
- 🔴 NO = No confirmed bearish setup yet
- ⚪ N/A = Opening range not yet established
How to Use :
1. Add to Chart - Works best on stocks, futures, and indices with regular market hours (9:30 AM EST open)
2. Choose Your Timeframe - View on any timeframe; indicator automatically analyzes 1-minute data
3. Monitor the Table - Watch for "YES" signals in Breakout or Breakdown rows
4. Set Alerts - Enable alerts for your preferred ORB timeframes
5. Plan Your Trade - Use ORB levels as entry points and initial stop-loss levels
Tips :
- Combine multiple timeframe confirmations for higher probability setups
- Use ORB High/Low levels as natural support/resistance zones
- The 5-min ORB gives faster signals; 30-min ORB gives stronger trends
- Best results typically occur in the first 1-2 hours after market open
- Works on all markets but optimized for regular trading hours (9:30 AM EST)
Key Features Summary :
✓ Multi-timeframe opening range tracking (5, 15, 30-minute)
✓ Retest confirmation logic to filter false breakouts
✓ Works on any chart timeframe with 1-minute precision
✓ Bullish and bearish signal detection
✓ Customizable visual display with toggle options
✓ Individual alerts for each timeframe and direction
✓ Clean, professional table interface
✓ No repainting - signals are final once confirmed
✓ Suitable for all experience levels
Pine Script® インジケーター
AI-based Price action confluence dashboard# **AI-Based Price Action Confluence Dashboard - Publication Guide**
Here's a comprehensive introduction guide for your TradingView indicator publication:
***
## **📊 TITLE**
**AI-Based Price Action Confluence Dashboard**
***
## **🎯 SHORT DESCRIPTION** (For the summary field)
A sophisticated real-time confluence scoring system that analyzes multiple price action signals across 15-minute timeframes, providing traders with an AI-weighted scoring mechanism (0-6 scale) to identify high-probability trade setups through visual signal panels and intelligent path detection.
***
## **📝 FULL DESCRIPTION**
### **Overview**
The AI-Based Price Action Confluence Dashboard is an advanced technical indicator designed to eliminate guesswork in intraday trading by systematically scoring and displaying multiple price action signals in real-time. Unlike traditional single-indicator approaches, this dashboard employs a confluence methodology that combines multiple independent signals to provide stronger trade confirmations and reduce false signals.
This indicator is specifically optimized for **1-minute chart analysis** while monitoring **15-minute price structure**, making it ideal for day traders and scalpers who need precise entry timing with larger timeframe context.
***
### **🔑 Key Features**
**✅ Real-Time AI Confluence Scoring**
- Dynamic scoring system (0-6 points) for both bullish and bearish setups
- Visual meter display shows signal strength at a glance
- Color-coded backgrounds indicate confluence levels (strong, moderate, mixed)
**✅ Multi-Signal Analysis**
The dashboard tracks 6 distinct signal types:
1. **FTFC (First to Finish Close)** - Base & Bonus signals
2. **Long/Short Grab** - Liquidity sweep patterns (Path A)
3. **High/Low Hold** - Extended momentum confirmation (+2 bonus)
4. **2-Up/2-Down** - Clean breakout patterns (Path B)
5. **Breakaway** - First candle gap strategies
**✅ Intelligent Path Detection**
- Mutually exclusive path logic prevents signal conflicts
- Automatically identifies whether price is following a "sweep path" or "clean path"
- Unavailable paths are clearly marked with gray indicators
**✅ Visual Signal Panels**
- 🟢 Green Light = Bullish signal ACTIVE
- 🔴 Red Light = Bearish signal ACTIVE
- 🟡 Yellow Light = Signal BUILDING (conditions partially met)
- ⚪ White Light = Signal OFF
- ▪️ Gray Square = Path UNAVAILABLE (mutually exclusive)
**✅ Comprehensive Alert System**
- 10 different alert conditions covering all major signals
- Strong confluence alerts (5+ points)
- Individual signal completion alerts
- Customizable alert messages
***
### **📐 How It Works**
#### **The Confluence Methodology**
This indicator implements a sophisticated confluence trading approach where multiple independent price action signals are combined to identify high-probability setups. Each signal type contributes points to either the bullish or bearish score, with a maximum of 6 points per direction.
**Scoring Breakdown:**
**BULLISH SIGNALS:**
- FTFC Base (15m close > previous 15m close) = +1
- FTFC Bonus (price clears 15th candle high) = +1
- **PATH A (Sweep):** Long Grab = +1, High Hold Bonus = +2
- **PATH B (Clean):** 2-Up = +1, 2-Up Bonus = +1
- Breakaway (gap above first candle) = +1
**BEARISH SIGNALS:**
- FTFC Base (15m close < previous 15m close) = +1
- FTFC Bonus (price clears 15th candle low) = +1
- **PATH A (Sweep):** Short Grab = +1, Low Hold Bonus = +2
- **PATH B (Clean):** 2-Down = +1, 2-Down Bonus = +1
- Breakaway (gap below first candle) = +1
#### **Path Detection Logic**
The indicator automatically determines which path the market is following:
**PATH A: SWEEP PATH**
- Activated when previous 15m low (bull) or high (bear) is breached
- Indicates liquidity grab before reversal
- Includes powerful +2 bonus for "Hold" confirmations
- Mutually exclusive with Path B
**PATH B: CLEAN PATH**
- Activated when previous 15m low (bull) or high (bear) holds
- Indicates strong directional momentum without sweep
- Cleaner price action but smaller point potential
- Mutually exclusive with Path A
This mutual exclusivity prevents double-counting and ensures signal accuracy.
***
### **🎨 How to Use**
#### **Installation**
1. Add indicator to your 1-minute chart
2. The dashboard appears as a table overlay (default: top right)
3. No additional indicators required - this is a complete system
#### **Reading the Dashboard**
**Top Section - Confluence Meter:**
- Shows current bull/bear scores with visual dot meters
- Background color changes based on confluence strength:
- **Bright Green/Red** = 5+ points (strong directional bias)
- **Medium Green/Red** = 3+ points (moderate bias)
- **Orange** = 3+ points both sides (conflicting signals)
- **Gray** = Low confluence (choppy conditions)
**Signal Panels Section:**
- Each row shows a signal type with bull/bear lights side-by-side
- Active signals (🟢🔴) contribute to the total score
- Building signals (🟡) indicate potential setups forming
- Unavailable paths (▪️) show which exclusive path is blocked
#### **Trading Strategy**
**High-Probability Long Entries:**
- Bull score ≥ 5 AND bear score ≤ 1
- Multiple green lights active in signal panels
- PATH A or PATH B showing full completion
- Consider entry on pullback to key 15m level
**High-Probability Short Entries:**
- Bear score ≥ 5 AND bull score ≤ 1
- Multiple red lights active in signal panels
- PATH A or PATH B showing full completion
- Consider entry on rally to key 15m level
**Avoid Trading When:**
- Both scores are 3+ (conflicting signals)
- No path is showing active/building status
- Score is below 3 on both sides (low confluence)
#### **Risk Management**
- Use 15m swing high/low for stop placement
- Target opposing 15m level or previous session extremes
- Scale out at partial targets when confluence decreases
- Best results when combined with proper position sizing
***
### **⚙️ Customization**
**Dashboard Settings:**
- **Table Location:** Top Left, Top Right, Bottom Left, Bottom Right
- **Text Size:** Tiny, Small, Normal, Large
**Color Scheme:**
- **Bullish Color:** Customize green for bull signals (default: #00cc66)
- **Bearish Color:** Customize red for bear signals (default: #ff4444)
- **Building Color:** Customize yellow for forming signals (default: #ffaa00)
- **Inactive Color:** Customize gray for off signals (default: #555555)
- **Unavailable Color:** Customize dark gray for blocked paths (default: #333333)
All colors can be adjusted to match your chart theme or visual preferences.
***
### **🎯 Best Practices**
1. **Use on 1-minute charts only** - The indicator is calibrated for this timeframe
2. **Trade during liquid sessions** - Best results during NY/London overlap
3. **Wait for 3+ confluence** - Minimum threshold for trade consideration
4. **Watch path transitions** - Signal strength changes when paths flip
5. **Use alerts strategically** - Set alerts for 5+ confluence to catch strong setups
6. **Combine with volume** - High volume confirms signal validity
7. **Respect 15m structure** - Don't fight the larger timeframe bias
***
### **⚠️ Important Notes**
- This indicator is designed for **intraday trading only**
- Requires active monitoring during trading sessions
- Works best on liquid instruments (major forex pairs, indices, large-cap stocks)
- Not suitable for swing trading or position trading
- Past performance does not guarantee future results
- Always use proper risk management and position sizing
***
### **🏷️ Category**
**Oscillators** or **Volatility** (choose based on TradingView categories)
***
### **🏷️ Suggested Tags**
- confluence
- price action
- day trading
- scalping
- intraday
- signals
- dashboard
- multi-timeframe
- 1-minute
- 15-minute
***
### **📜 Disclaimer**
This indicator is a tool for technical analysis and should not be used as the sole basis for trading decisions. All trading involves risk, and you should never risk more than you can afford to lose. The developer assumes no responsibility for trading losses incurred through the use of this indicator. Always practice proper risk management and consider your own risk tolerance before trading.
Pine Script® インジケーター
Trend Break Targets [MarkitTick]Trend Break Targets
Trend Break Targets is a technical analysis tool designed to assist traders in identifying trendline breakouts and projecting potential price targets based on market geometry. Unlike fully automated indicators that guess trendlines, this tool provides you with precise control by allowing you to manually Pivot Point the trendline to specific points in time, while automating the complex math of target projection and structure mapping.
Theoretical Basis & Concepts
This indicator is grounded in classic technical analysis principles found in foundational trading literature. It automates the following methodology:
Drawing a trend line between two key points to represent dynamic support or resistance.
Identifying a breakout when the price closes above or below this line, potentially signaling a change in trend.
Calculating a price target by measuring the vertical distance between the breakout line and the last high/low (pivot), then projecting that same distance in the direction of the breakout.
This concept is based on methods and "Measured Move" theories explained in classic books such as "Technical Analysis of Stock Trends" by Edwards & Magee, "Technical Analysis of the Financial Markets" by John Murphy, and in Thomas Bulkowski's Price Pattern Studies.
How It Works
Pivot Pointed Trendline Construction The script draws a trendline between two user-defined points in time (Start Date and End Date). It calculates the slope between these points and extends the line infinitely to the right, allowing you to define the exact structure (e.g., a resistance trendline on a wedge).
Breakout Detection The script monitors the "Price Source" (High, Low, or Close) relative to the extended trendline.
A Bullish Breakout (BC) occurs when the Close crosses above a bearish trendline.
A Bearish Breakout (BC) occurs when the Close crosses below a bullish trendline.
Dynamic Target Projection (The Math) Upon a confirmed breakout, the script automatically calculates three distinct targets by identifying the most significant "Swing Point" (Pivot) prior to the breakout.
Distance (D): The vertical distance between the Trendline and the Pivot Price at the specific bar where the pivot occurred.
Target 1 (T1): The Breakout Price +/- (Distance × 1.0). This represents a classic 1:1 measured move.
Target 2 (T2): The Breakout Price +/- (Distance × 1.618). Based on the Golden Ratio extension.
Target 3 (T3): The Breakout Price +/- (Distance × 2.618).
Market Structure (CHOCH) The script includes an optional Change of Character (CHOCH) module. This runs independently of the trendline logic, identifying local Swing Highs and Swing Lows based on the "Swing Detection Length." It plots dashed lines and labels to visualize immediate shifts in market structure.
How to Use This Tool
This is an interactive tool that requires user input to define the setup.
Identify a Setup: Locate a clear trend, wedge, or flag pattern on your chart.
Set Pivot Points: Go to the Indicator Settings. Input the exact Start Date and End Date corresponding to the two main touches of your trendline.
Monitor for Breakout: The script will extend the line. Wait for a "BC" label to appear.
Trade Management: Once "BC" prints, the T1, T2, and T3 lines will instantly render. These can be used as potential take-profit zones or areas to tighten stop-losses.
Settings & Configuration
Indicator Settings
Start/End Date: The timestamp Pivot Points for your trendline.
Price Source: Determines what price (High or Low) Pivot Points the line and triggers the breakout.
Pivot Left/Right: Adjusts the sensitivity for finding the "Pivot Before Break" used for target calculations.
Extend Target Line: How far forward the target lines are drawn.
Visual Style
Colors: Fully customizable colors for the Trendline, Breakout Labels, and each Target level (T1, T2, T3).
Gold Bullish Reversal
This analysis dissects a confirmed bullish reversal on Gold using a custom Trend Break system. The setup identifies a transition from a bearish corrective phase to bullish momentum, validated by a structural break and a geometric target projection.
Trend Identification (The Pivot Points) The descending white trendline serves as the primary dynamic resistance, defining the bearish correction.
Pivot Points: The line is drawn connecting two significant swing highs, marked by Label 1 and Label 2.
Logic: These points represent the "lower highs" characteristic of the previous downtrend. As long as price remained below this trajectory, the bearish bias was intact.
The Trigger: Breakout & Confirmation The transition occurs at the candle marked BC (Breakout Candle).
Breakout Criteria: The indicator logic dictates that a signal is only valid when the bar closes above the trendline. This filters out intraday wicks and ensures genuine buyer commitment.
CHOCH Confluence: Immediately following the breakout, a CHOCH (Change of Character) label appears. This signals a shift in market structure, indicating that the internal lower-high/lower-low sequence has been violated, adding probability to the reversal.
Target Projection: The Measured Move The vertical green lines (T1, T2) represent profit objectives derived from the depth of the prior move. The logic calculates the distance between the breakout line and the lowest pivot prior to the break.
T1 (Standard Target): This is a 1:1 projection of the pre-breakout volatility. We see price action initially stalling near this level, confirming it as a zone of interest.
T2 (Golden Ratio Extension): The second target is calculated as the initial distance multiplied by 1.618 (Fibonacci Golden Ratio). The chart shows the price rallying aggressively through T1 to tap the T2 zone, often considered an exhaustion or major take-profit level in harmonic extensions.
Conclusion Gold has successfully invalidated the 4-hour bearish trendline. The confluence of a confirmed close above resistance (BC) and a structural shift (CHOCH) provided a high-probability long setup. The price has now fulfilled the T2 (1.618) extension, suggesting traders should watch for consolidation or a reaction at this key Fibonacci resistance level.
Bearish Trendline Breakdown
The image displays a Bearish Trendline Breakdown on the Gold (XAUUSD) 4-hour chart. The indicator is actually functioning in "Low" mode here (connecting swing lows to form support), which triggers the bearish logic found in the code. Here is the step-by-step breakdown:
The Setup: Pivot Points & Trendline
Visual: The Blue Labels "1" and "2" connected by a white diagonal line.
Code Logic: These are the user-defined start and end points.
Pivot Point 1 (startDate): The starting pivot of the trendline.
Pivot Point 2 (endDate): The ending pivot.
Trendline: The code draws a line between these two points and extends it to the right (extend.right). In this specific image, the line acts as a Support Trendline.
The Trigger: Break Candle (BC)
Visual: The Red Label "BC" appearing just below the white trendline.
Code Logic: This is the execution signal. The code detects a "Down Break" (dnBreak) because the Price Source was likely set to "Low" and the candle's Close was lower than the Trendline Price at that specific bar (close < currLinePrice). This confirms the support level has been breached.
The Projection: Targets (T1 & T2)
Visual: The Green Labels "T1" and "T2" with dotted horizontal lines projected downward.
Code Logic: These are profit targets based on a "Measured Move."
Pivot Calculation: The script looks back for a recent "Pivot High" (the peak before the crash) to calculate the volatility/distance (dist) between that peak and the trendline.
T1 (Conservative): The price is projected downward by 1x that distance (currLinePrice - dist).
T2 (Extended): The price is projected downward by 1.618x that distance (Golden Ratio extension).
Market Context: CHOCH
Visual: The small Red/Orange "CHOCH" labels appearing above the price action.
Code Logic: This is a secondary confirmation system running independently of the trendline. It detects a Change of Character (structural shift). The red labels indicate a "Bearish CHOCH," meaning the price broke below a significant prior swing low (last_swing_low). This supports the bearish bias of the trendline break.
Disclaimer This tool is for educational and technical analysis purposes only. Breakouts can fail (fake-outs), and past geometric patterns do not guarantee future price action. Always manage risk and use this tool in conjunction with other forms of analysis.
Pine Script® インジケーター
Fair Value Gap Signals [Kodexius]Fair Value Gap Signals is an advanced market structure tool that automatically detects and tracks Fair Value Gaps (FVGs), evaluates the quality of each gap, and highlights high value reaction zones with visual metrics and signal markers.
The script is designed for traders who focus on liquidity concepts, order flow and mean reversion. It goes beyond basic FVG plotting by continuously monitoring how price interacts with each gap and by quantifying three key aspects of each zone:
-Entry velocity inside the gap
-Volume absorption during tests
-Structural integrity and depth of penetration
The result is a dynamic, information rich visualization of which gaps are being respected, which are being absorbed, and where potential reversals or continuations are most likely to occur.
All visual elements are configurable, including the maximum number of visible gaps per direction, mitigation method (close or wick) and an ATR based filter to ignore insignificant gaps in low volatility environments.
🔹 Features
🔸 Automated Fair Value Gap Detection
The script detects both bullish and bearish FVGs based on classic three candle logic:
Bullish FVG: current low is strictly above the high from two bars ago
Bearish FVG: current high is strictly below the low from two bars ago
🔸 ATR Based Gap Filter
To avoid clutter and low quality signals, the script can ignore very small gaps using an ATR based filter.
🔸Per Gap State Machine and Lifecycle
Each gap is tracked with an internal status:
Fresh: gap has just formed and has not been tested
Testing: price is currently trading inside the gap
Tested: gap was tested and left, waiting for a potential new test
Rejected: price entered the gap and then rejected away from it
Filled: gap is considered fully mitigated and no longer active
This state machine allows the script to distinguish between simple touches, multiple tests and meaningful reversals, and to trigger different alerts accordingly.
🔸 Visual Ranking of Gaps by Metrics
For each active gap, three additional horizontal rank bars are drawn on top of the gap area:
Rank 1 (Vel): maximum entry velocity inside the gap
Rank 2 (Vol): relative test volume compared to average volume
Rank 3 (Dpt): remaining safety of the gap based on maximum penetration depth
These rank bars extend horizontally from the creation bar, and their length is a visual score between 0 and 1, scaled to the age of the gap. Longer bars represent stronger or more favorable conditions.
🔸Signals and Rejection Markers
When a gap shows signs of rejection (price enters the gap and then closes away from it with sufficient activity), the script can print a signal label at the reaction point. These markers summarize the internal metrics of the gap using a tooltip:
-Velocity percentage
-Volume percentage
-Safety score
-Number of tests
🔸 Flexible Mitigation Logic (Close or Wick)
You can choose how mitigation is defined via the Mitigation Method input:
Close: the gap is considered filled only when the closing price crosses the gap boundary
Wick: a full fill is detected as soon as any wick crosses the gap boundary
🔸 Alert Conditions
-New FVG formed
-Price entering a gap (testing)
-Gap fully filled and invalidated
-Rejection signal generated
🔹Calculations
This section summarizes the main calculations used under the hood. Only the core logic is covered.
1. ATR Filter and Gap Size
The script uses a configurable ATR length to filter out small gaps. First the ATR is computed:
float atrVal = ta.atr(atrLength)
Gap size for both directions is then measured:
float gapSizeBull = low - high
float gapSizeBear = low - high
If useAtrFilter is enabled, gaps smaller than atrVal are ignored. This ties the minimum gap size to the current volatility regime.
2. Fair Value Gap Detection
The basic FVG conditions use a three bar structure:
bool fvgBull = low > high
bool fvgBear = high < low
For bullish gaps the script stores:
-top as low of the current bar
-bottom as high
For bearish gaps:
-top as high of the current bar
-bottom as low
This defines the price range that is considered the imbalance area.
3. Depth and Safety Score
Depth measures how far price has penetrated into the gap since its creation. For each bar, the script computes a currentDepth and updates the maximum depth:
float currentDepth = 0.0
if g.isBullish
if l < g.top
currentDepth := g.top - l
else
if h > g.bottom
currentDepth := h - g.bottom
if currentDepth > g.maxDepth
g.maxDepth := currentDepth
The safety score expresses how much of the gap remains intact:
float depthRatio = g.maxDepth / gapSize
float safetyScore = math.max(0.0, 1.0 - depthRatio)
safetyScore near 1: gap is mostly untouched
safetyScore near 0: gap is mostly or fully filled
4. Velocity Metric
Velocity captures how aggressively price moves inside the gap. It is based on the body to range ratio of each bar that trades within the gap and rewards bars that move in the same direction as the gap:
float barRange = h - l
float bodyRatio = math.abs(close - open) / barRange
float directionBonus = 0.0
if g.isBullish and close > open
directionBonus := 0.2
else if not g.isBullish and close < open
directionBonus := 0.2
float currentVelocity = math.min(bodyRatio + directionBonus, 1.0)
The gap keeps track of the strongest observed value:
if currentVelocity > g.maxVelocity
g.maxVelocity := currentVelocity
This maximum is later used as velScore when building the velocity rank bar.
5. Volume Accumulation and Volume Score
While price is trading inside a gap, the script accumulates the traded volume:
if isInside
g.testVolume += volume
It also keeps track of the number of tests and the volume at the start of the first test:
if g.status == "Fresh"
g.status := "Testing"
g.testCount := 1
g.testStartVolume := volume
An average volume is computed using a 20 period SMA:
float volAvg = ta.sma(volume, 20)
The expected volume is approximated as:
float expectedVol = volAvg * math.max(1, (bar_index - g.index) / 2)
The volume score is then:
float volScore = math.min(g.testVolume / expectedVol, 1.0)
This produces a normalized 0 to 1 metric that shows whether the gap has attracted more or less volume than expected over its lifetime.
6. Rank Bar Scaling
All three scores are projected visually along the time axis as horizontal bars. The script uses the age of the gap in bars as the maximum width:
float maxWidth = math.max(bar_index - g.index, 1)
Then each metric is mapped to a bar length:
int len1 = int(math.max(1, maxWidth * velScore))
g.rankBox1.set_right(g.index + len1)
int len2 = int(math.max(1, maxWidth * volScore))
g.rankBox2.set_right(g.index + len2)
int len3 = int(math.max(1, maxWidth * safetyScore))
g.rankBox3.set_right(g.index + len3)
This creates an intuitive visual representation where stronger metrics produce longer rank bars, making it easy to quickly compare the relative quality of multiple FVGs on the chart.
Pine Script® インジケーター
15 min Trailstop15m High/Low Liquidity Lines (1m) — Indicator Description
15m High/Low Liquidity Lines (1m) is a precision liquidity-mapping tool designed for intraday traders who understand the importance of higher-timeframe liquidity levels while executing on the 1-minute chart.
This indicator automatically detects confirmed 15-minute swing highs and swing lows using pivot logic. When a new 15m high or low forms:
✔ Liquidity Line Generation
A horizontal line is drawn exactly at the price level of the pivot.
The line is anchored to the exact 1-minute candle that produced the 15m high/low, ensuring perfect visual alignment.
The line extends only up to the current bar — not across the whole chart.
Optional text labels (“15m High”, “15m Low”) can be shown at the start of each line.
✔ Auto-Cleanup (Smart Liquidity Sweep Detection)
If price trades through the level, the corresponding line and label are:
Instantly deleted
Marking the level as taken/swept
Allowing the chart to stay clean and focused on active liquidity only
This mimics institutional liquidity logic: once the high or low is violated, the target is considered filled and removed.
✔ Alerts
The indicator includes built-in alerts that fire when:
A new 15m high is confirmed
A new 15m low is confirmed
This allows the trader to react immediately when fresh liquidity levels appear.
✔ Customization Options
You can fully tailor the visual representation:
Turn highs and/or lows on or off
Choose line style (solid, dashed, dotted)
Customize line color and thickness
Customize the label style, size, and transparency
Who Is This For?
This indicator is ideal for:
ICT-style traders
Liquidity-based scalpers
1-minute ES/NQ traders
Anyone who uses HTF liquidity levels to frame trades on the LTF
It provides a clean, automated method to track active 15-minute liquidity levels directly on the 1-minute chart with zero clutter and perfect alignment.
Pine Script® インジケーター


