SM Analysis Rejection Based Supply and Demand Zones🔷 SM-Analysis | Rejection-Based Supply & Demand Zones (Smart Money)
📌 Smart Money Supply & Demand | Wick Rejection Zones | Institutional Levels
🔍 What This Indicator Does
SM-Analysis | Rejection-Based Supply & Demand Zones is a Smart Money Concept (SMC) indicator designed to automatically detect high-probability institutional Supply and Demand zones using strong wick rejection logic.
This tool highlights areas where price was aggressively rejected, often signalling the presence of large operators, liquidity grabs, and institutional defence zones.
Unlike traditional support & resistance indicators, this script filters weak levels and plots only meaningful rejection-based zones.
🚀 Key Features (SEO Optimized)
Smart Money Supply & Demand Zones
Wick Rejection Detection (Institutional Candles)
Non-Repainting Historical Zones
Intraday Noise Filter (Hide Current Day Zones)
Auto-Extending Zones
Supply (Red) & Demand (Green) Levels
Works on Forex, Crypto, Stocks, Indices, Futures
Suitable for Intraday, Swing & Positional Trading
🧠 Smart Money Logic Explained
This indicator analyses each candle and compares:
Upper Wick vs Body → Supply rejection
Lower Wick vs Body → Demand rejection
A zone is plotted only when wick rejection is statistically stronger than the candle body using a Wick Multiplier.
This logic helps identify:
Stop-hunt candles
Liquidity sweeps
Institutional order blocks (wick-based)
Price rejection zones
⏱ Intraday & Non-Repainting Behavior
🔘 Hide Current Day Boxes (Highly Recommended)
When enabled:
Zones created during the current trading day are hidden
Prevents incomplete or repaint-like zones
Only confirmed historical zones remain visible
If a zone is filled on the same day it was created, it is fully deleted to keep the chart clean and realistic.
🎯 How to Trade – Visual Examples
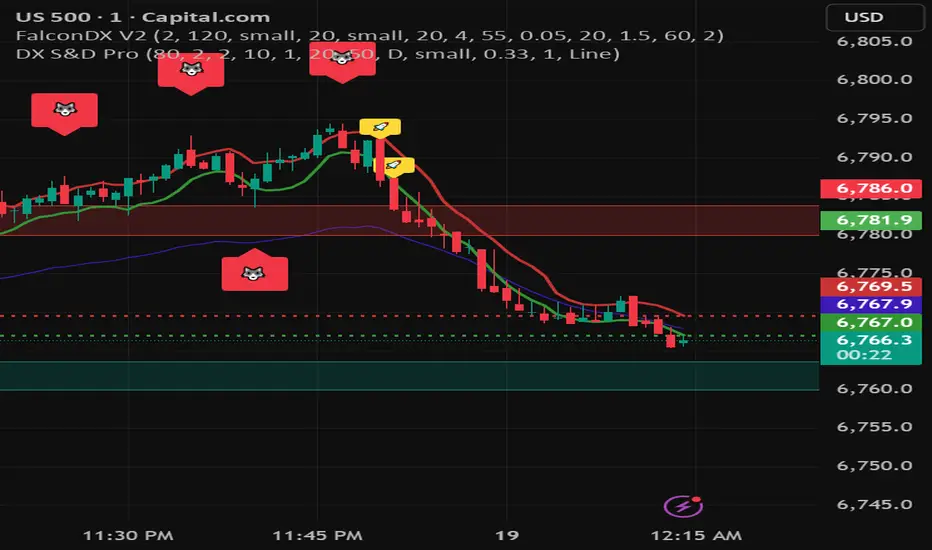
🟢 Demand Zone (Buy Setup)
Price forms a long lower wick → Demand zone is plotted
Wait for price to re-enter the green zone
Look for confirmation (bullish candle, structure support, RSI or volume)
Entry near zone bottom
Stop-loss below the zone
Targets at nearest supply zone or previous highs
🔴 Supply Zone (Sell Setup)
Price prints a long upper wick → Supply zone appears
Wait for price to retest the red zone
Look for bearish rejection or structure break
Entry near zone top
Stop-loss above the zone
Targets at nearest demand zone or liquidity lows
📊 Best Strategy Combinations
Market Structure (HH / HL / LL / LH)
Liquidity Sweeps
Trend Bias (EMA / VWAP)
RSI or Volume Confirmation
Multi-Timeframe Analysis
⚙️ Inputs Explained
Wick Multiplier – Controls rejection strength sensitivity
Hide Current Day Boxes – Filters intraday noise and repaint behaviour
📌 Best Timeframes
5m – 15m → Intraday Trading
30m – 1H → Swing Trading
4H – Daily → Institutional Zones
⚠️ Disclaimer
This indicator is a technical analysis tool and not a buy/sell signal. Always use proper risk management and confirmation.
🏷 Credits
Developed by: SM-Analysis
Institutional-grade Smart Money tools for precision traders.
Pine Script® インジケーター