OPEN-SOURCE SCRIPT
Double CCI
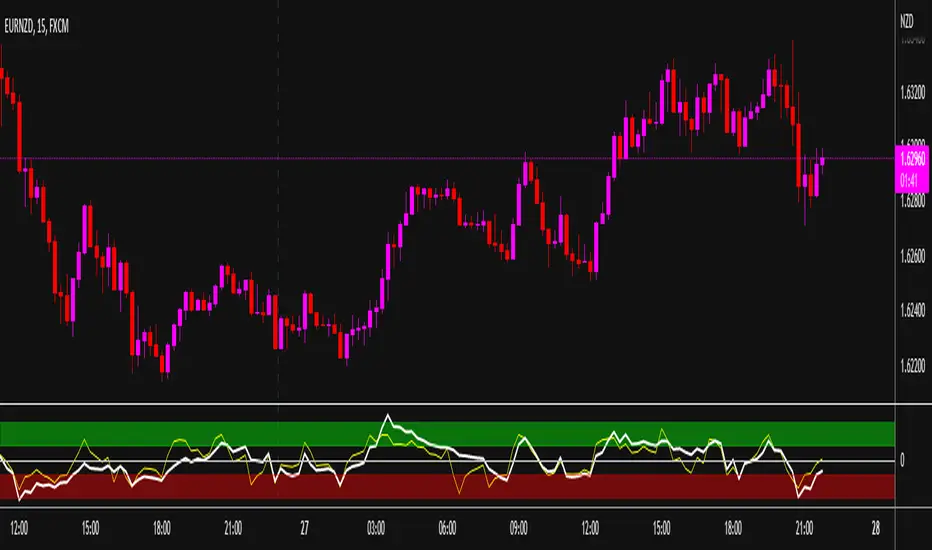
With this variant of the CCI indicator you have 2 CCIs. I call it convenience the fast and the slow.
The slow one has the default period of 20. The fast one has a lower value and will therefore also change his direction much faster.
I don't use this as a decisive indicator, but the fast one does indicate where the standard CCI might go and so you are already prepared for the decisive moment.
I've added a zero line so you can visually track whether the buyers or the sellers are predominant.
Between 0 and +100, as well as between 0 and -100 there is still a battle between buyers and sellers and it is better to wait a little longer before entering a trade.
From +100 to +250 I have colored the zone green; here the buyers are winning and it is a confirmation that you can safer enter the BUY.
From -100 to -250 it's colored red; here the sellers are firmly winning and it is a confirmation to go into a SELL.
Most values are adjustable via the settings and can be switched on or off.
This indicator is not intended to be used as the sole decision element, but rather to fine-tune your entry and exit points. Maybe wait a little longer than you normally would, but then be able to step in at the right time that there is enough volume in your desired direction.
Good luck with it and I would love feedback.
Thank you Tradingview-community.
オープンソーススクリプト
TradingViewの精神に則り、このスクリプトの作者はコードをオープンソースとして公開してくれました。トレーダーが内容を確認・検証できるようにという配慮です。作者に拍手を送りましょう!無料で利用できますが、コードの再公開はハウスルールに従う必要があります。
免責事項
この情報および投稿は、TradingViewが提供または推奨する金融、投資、トレード、その他のアドバイスや推奨を意図するものではなく、それらを構成するものでもありません。詳細は利用規約をご覧ください。
オープンソーススクリプト
TradingViewの精神に則り、このスクリプトの作者はコードをオープンソースとして公開してくれました。トレーダーが内容を確認・検証できるようにという配慮です。作者に拍手を送りましょう!無料で利用できますが、コードの再公開はハウスルールに従う必要があります。
免責事項
この情報および投稿は、TradingViewが提供または推奨する金融、投資、トレード、その他のアドバイスや推奨を意図するものではなく、それらを構成するものでもありません。詳細は利用規約をご覧ください。