(Refined & Structured):
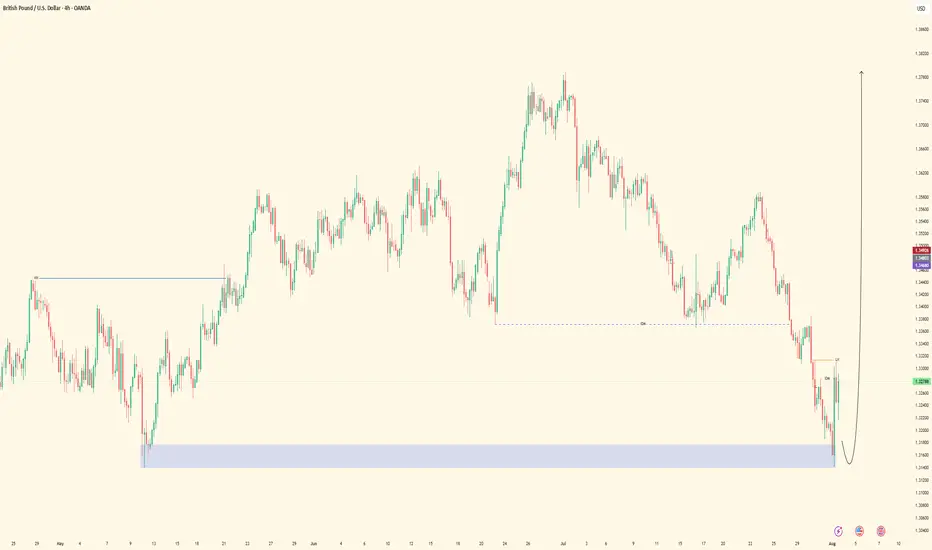
• Pair: GBPUSD
• Bias: Bullish
• 4H Overview: Bullish structure is given with strong intent. A major higher high was broken to the upside. Price swept significant sell-side liquidity and inducement, then mitigated a refined 4H OB with a clean smart money reaction—clear buyer interest.
• 30M Structure: Currently watching for a proper change of character (CHoCH). Still in analysis mode. Waiting for the lower high on the 30M to be breached and liquidity taken before considering execution.
• Entry Zone: Once price confirms with a CHoCH and mitigates the 30M internal OB, I’ll drop to the 5M to hunt for final confirmation before executing.
• Targets: 5M to 30M structural highs depending on price delivery.
• Mindset Note: The best setups come to those who wait. No rush. Let price do the talking. My trigger isn’t just structure—it’s precision and patience working together.
免責事項
この情報および投稿は、TradingViewが提供または推奨する金融、投資、トレード、その他のアドバイスや推奨を意図するものではなく、それらを構成するものでもありません。詳細は利用規約をご覧ください。
免責事項
この情報および投稿は、TradingViewが提供または推奨する金融、投資、トレード、その他のアドバイスや推奨を意図するものではなく、それらを構成するものでもありません。詳細は利用規約をご覧ください。